Introduction
Recently, Cursor has gained immense popularity, with numerous articles and videos discussing its features.

Cursor acts like a programming expert that can view your code in real-time, provide suggestions, catch errors, and help refactor code.
You don’t need to write a single line of code; just speak, and it can create a website, a Chrome extension, a key management system, and more for you.
At this rate of development, Cursor will eventually become the Pilot, while humans will be the Co-pilot!
In contrast, GitHub Copilot has limitations in its code modification and contextual referencing capabilities, leading it to remain just a Copilot.
GitHub Copilot can only append code but cannot modify existing code.
Cursor can both append and modify code.
GitHub Copilot uses two symbols (@ and #) to reference different contexts, which can be hard to remember.
Cursor simplifies this by using only one symbol (@) for context references, making it easier to use. No wonder GitHub Copilot is just a Copilot.
Why is it Called Cursor?
You might be wondering why it’s called Cursor. The name comes from its exceptional utilization of the cursor.
As mentioned earlier, Cursor’s strength lies in its ability to modify your code directly. It generates code completion suggestions based on the cursor’s position, allowing users to complete code with just the Tab key (of course, GitHub Copilot can also complete code, but let’s focus on the unique features of Cursor).
When modifying or refactoring existing code, Cursor provides modification suggestions based on context, displayed in a prompt box rather than as gray code completion hints.
Another impressive feature is Cursor Prediction, which predicts the next code position you might want to edit based on context.
Now you understand why it’s called Cursor!
Practical Example of Cursor’s Power
Let’s dive into a practical example to demonstrate Cursor’s powerful capabilities. Have you noticed the traffic on this website?
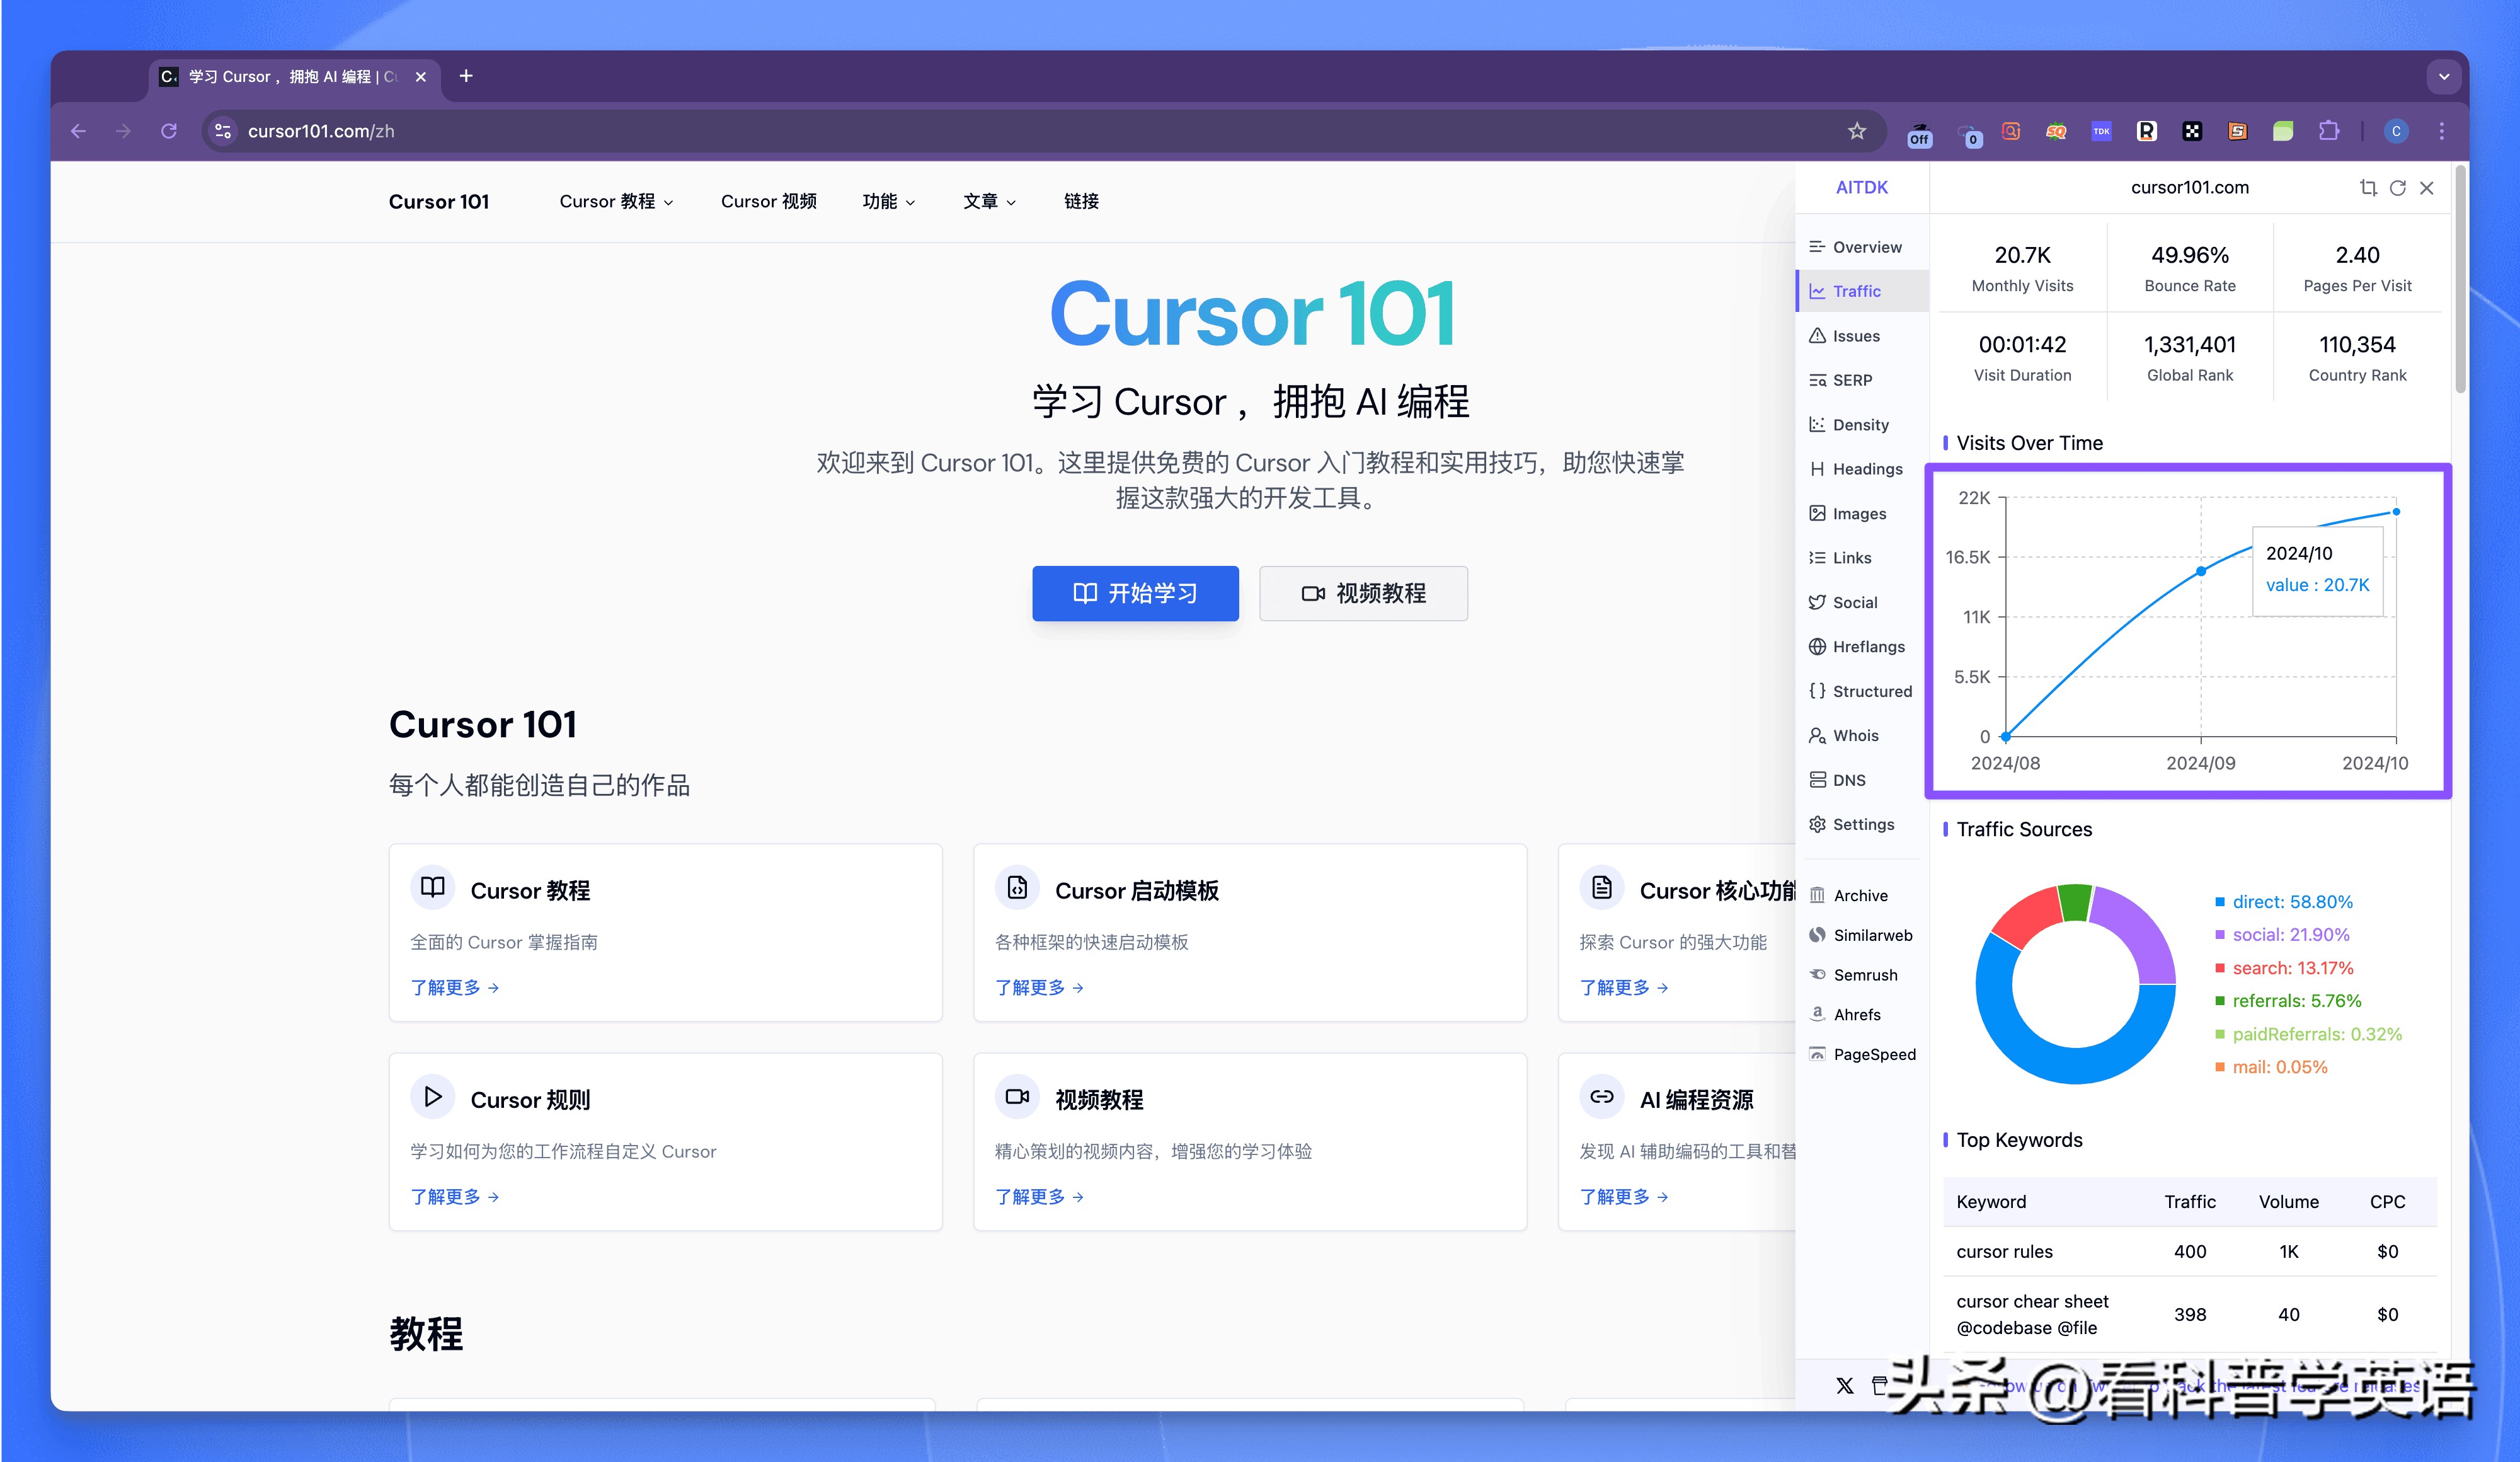
This site is a collection of tutorials for Cursor, following a navigation site format, and its traffic has been rapidly increasing since its launch.
You might think such a website requires advanced technical skills, but it doesn’t. I can replicate a similar site just by speaking!
To clarify: I don’t know Next.js, Tailwind CSS, or Node.js; I only instruct AI to do the work.
Setting Up the Development Environment
To quickly set up the development environment, we can use Sealos DevBox[1], which configures the development environment with a single click and automatically sets up a public domain name and HTTPS certificate.
First, access the Sealos desktop[2], open the Devbox application, create a new project, and select Next.js as the runtime environment.
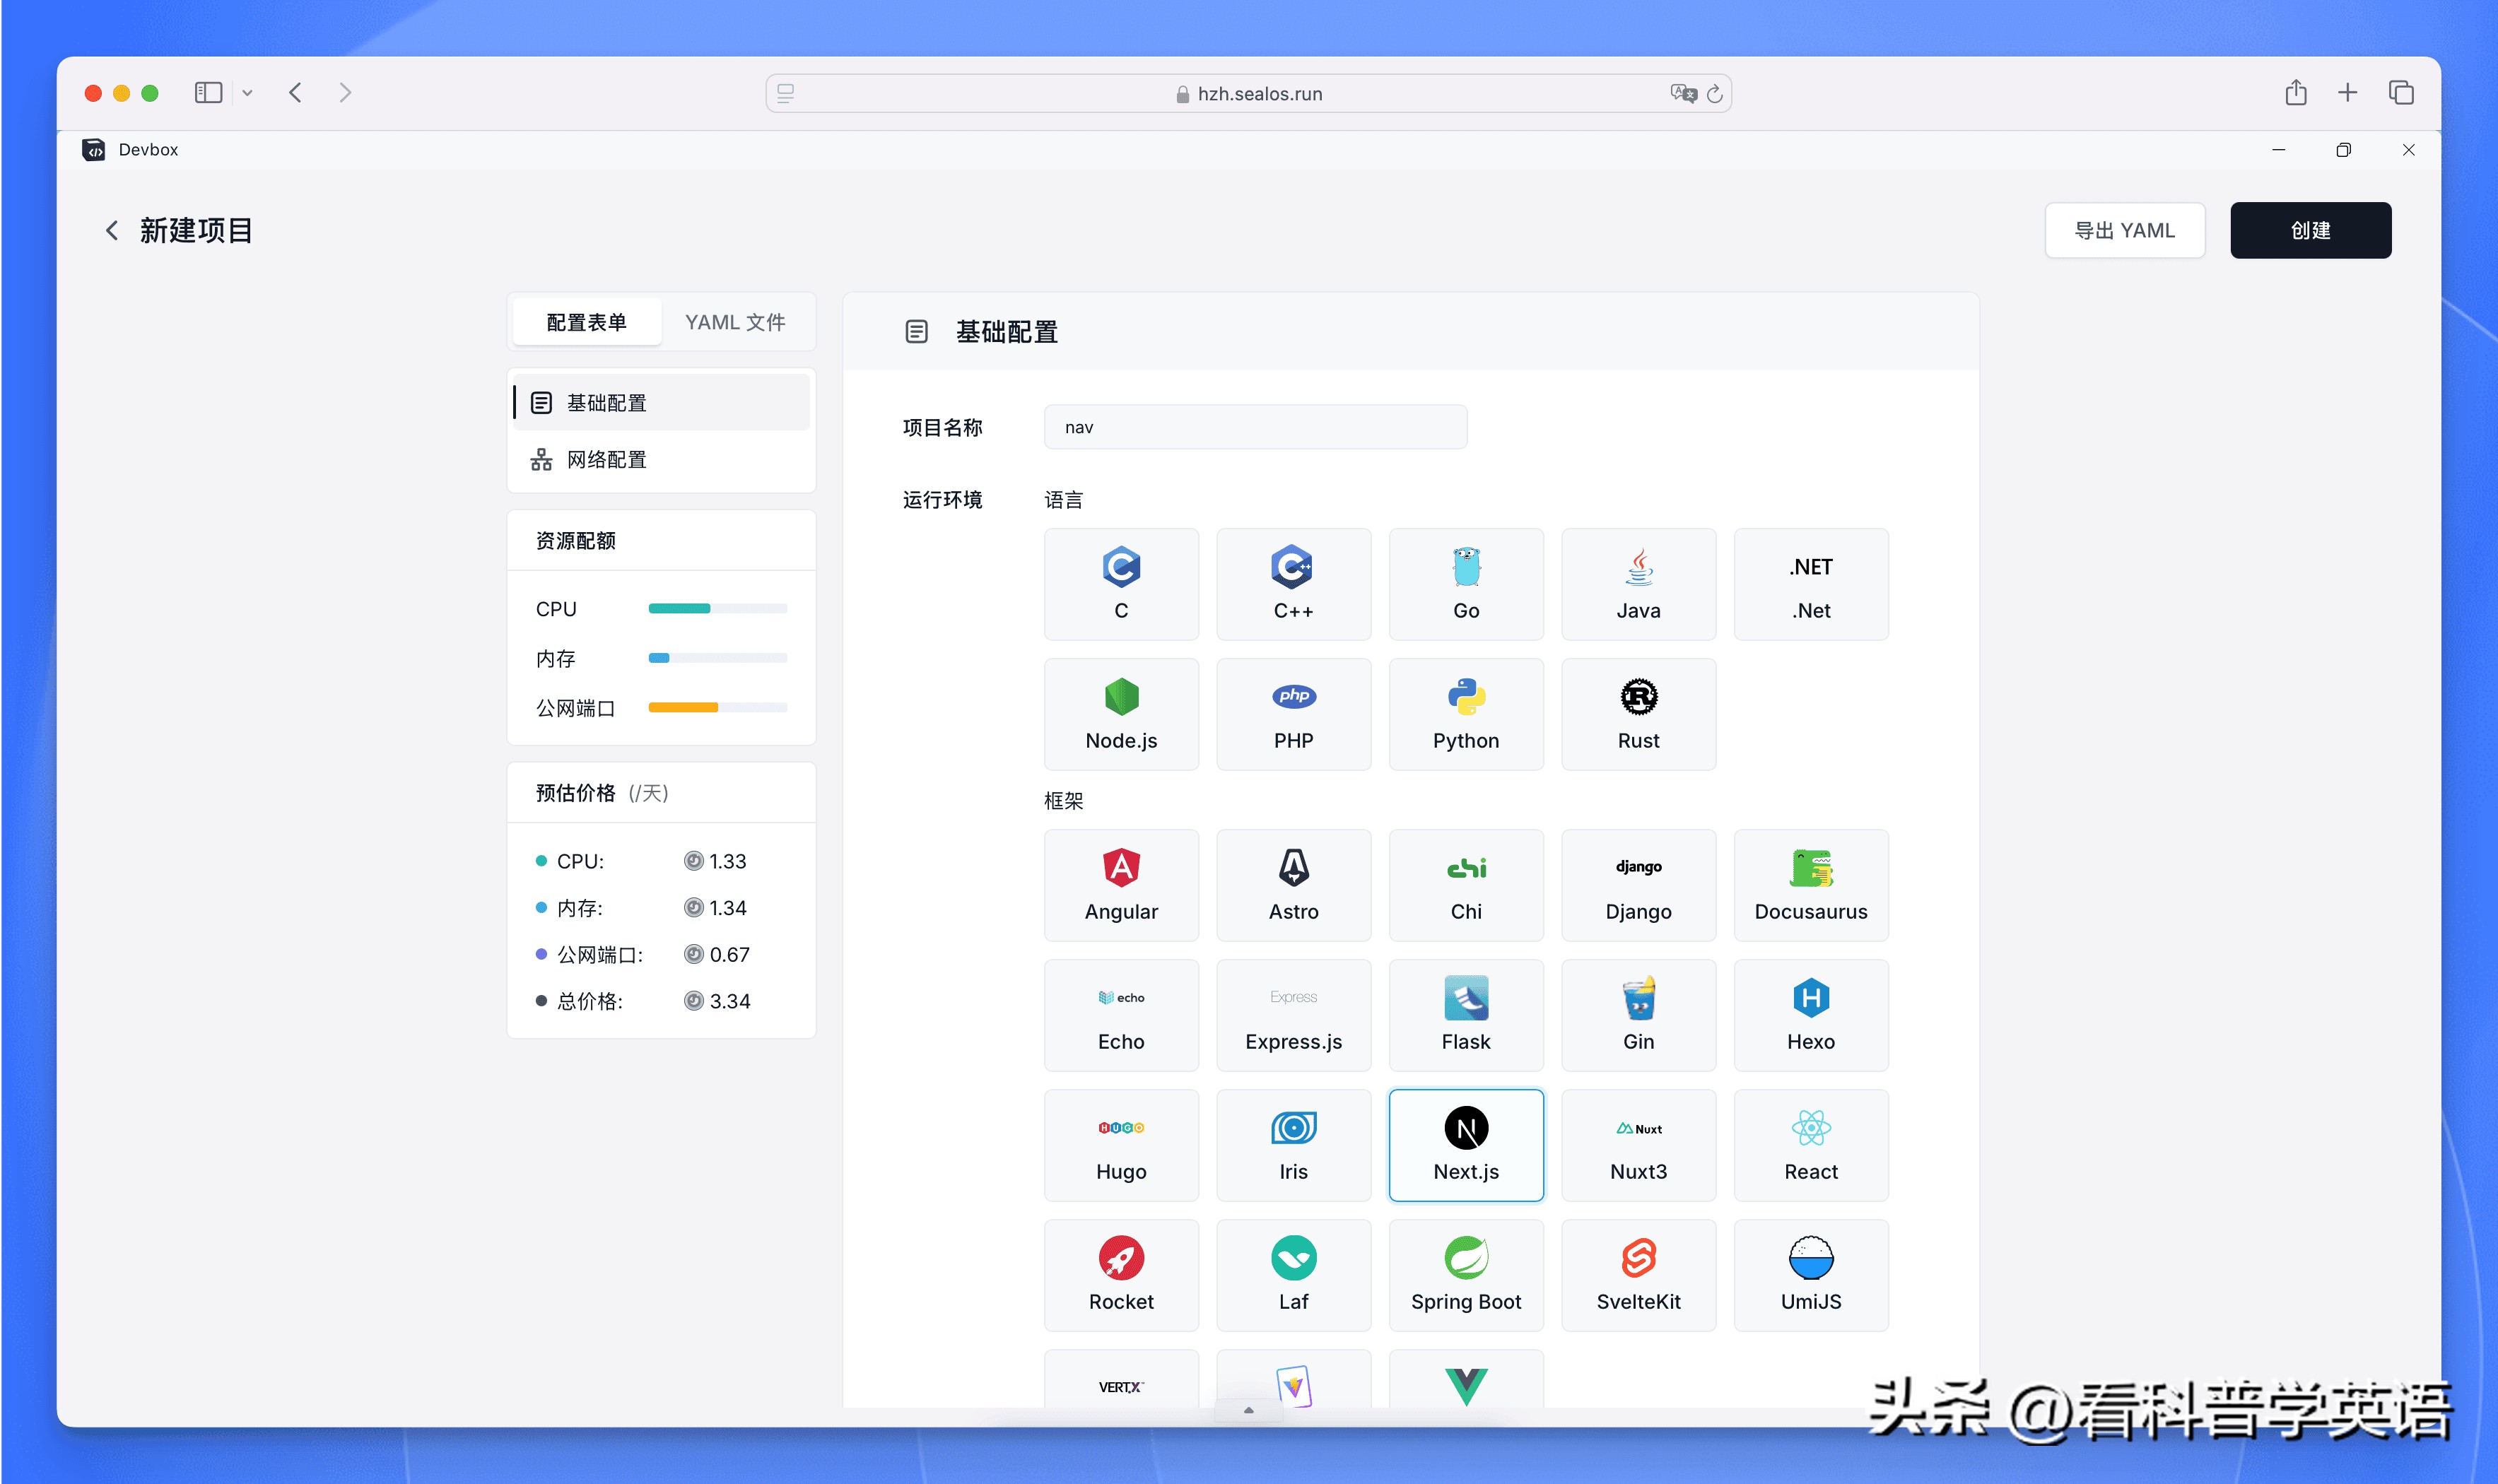
Devbox offers several practical features for developers:
- Flexible resource configuration: Adjust CPU and memory based on project needs to ensure performance while controlling costs.
- One-click HTTPS activation: The system automatically assigns a secure domain name, eliminating SSL certificate configuration worries.
- Fully automated domain management: Domain configuration is handled by the system from development to testing, allowing developers to focus on the code itself.
Once created, the development environment can be launched in seconds.
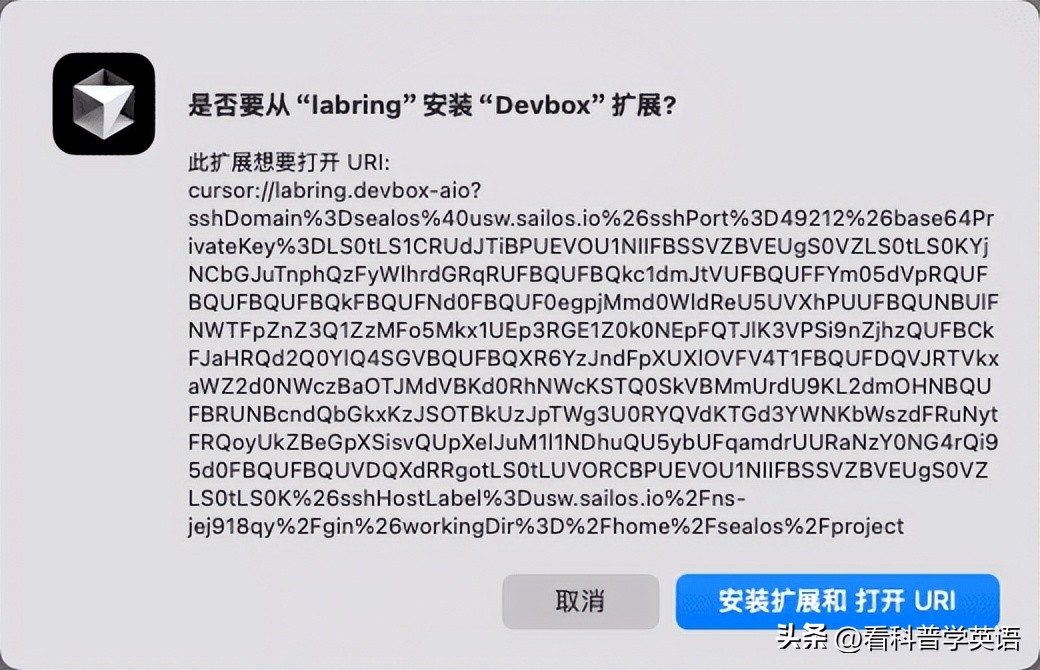
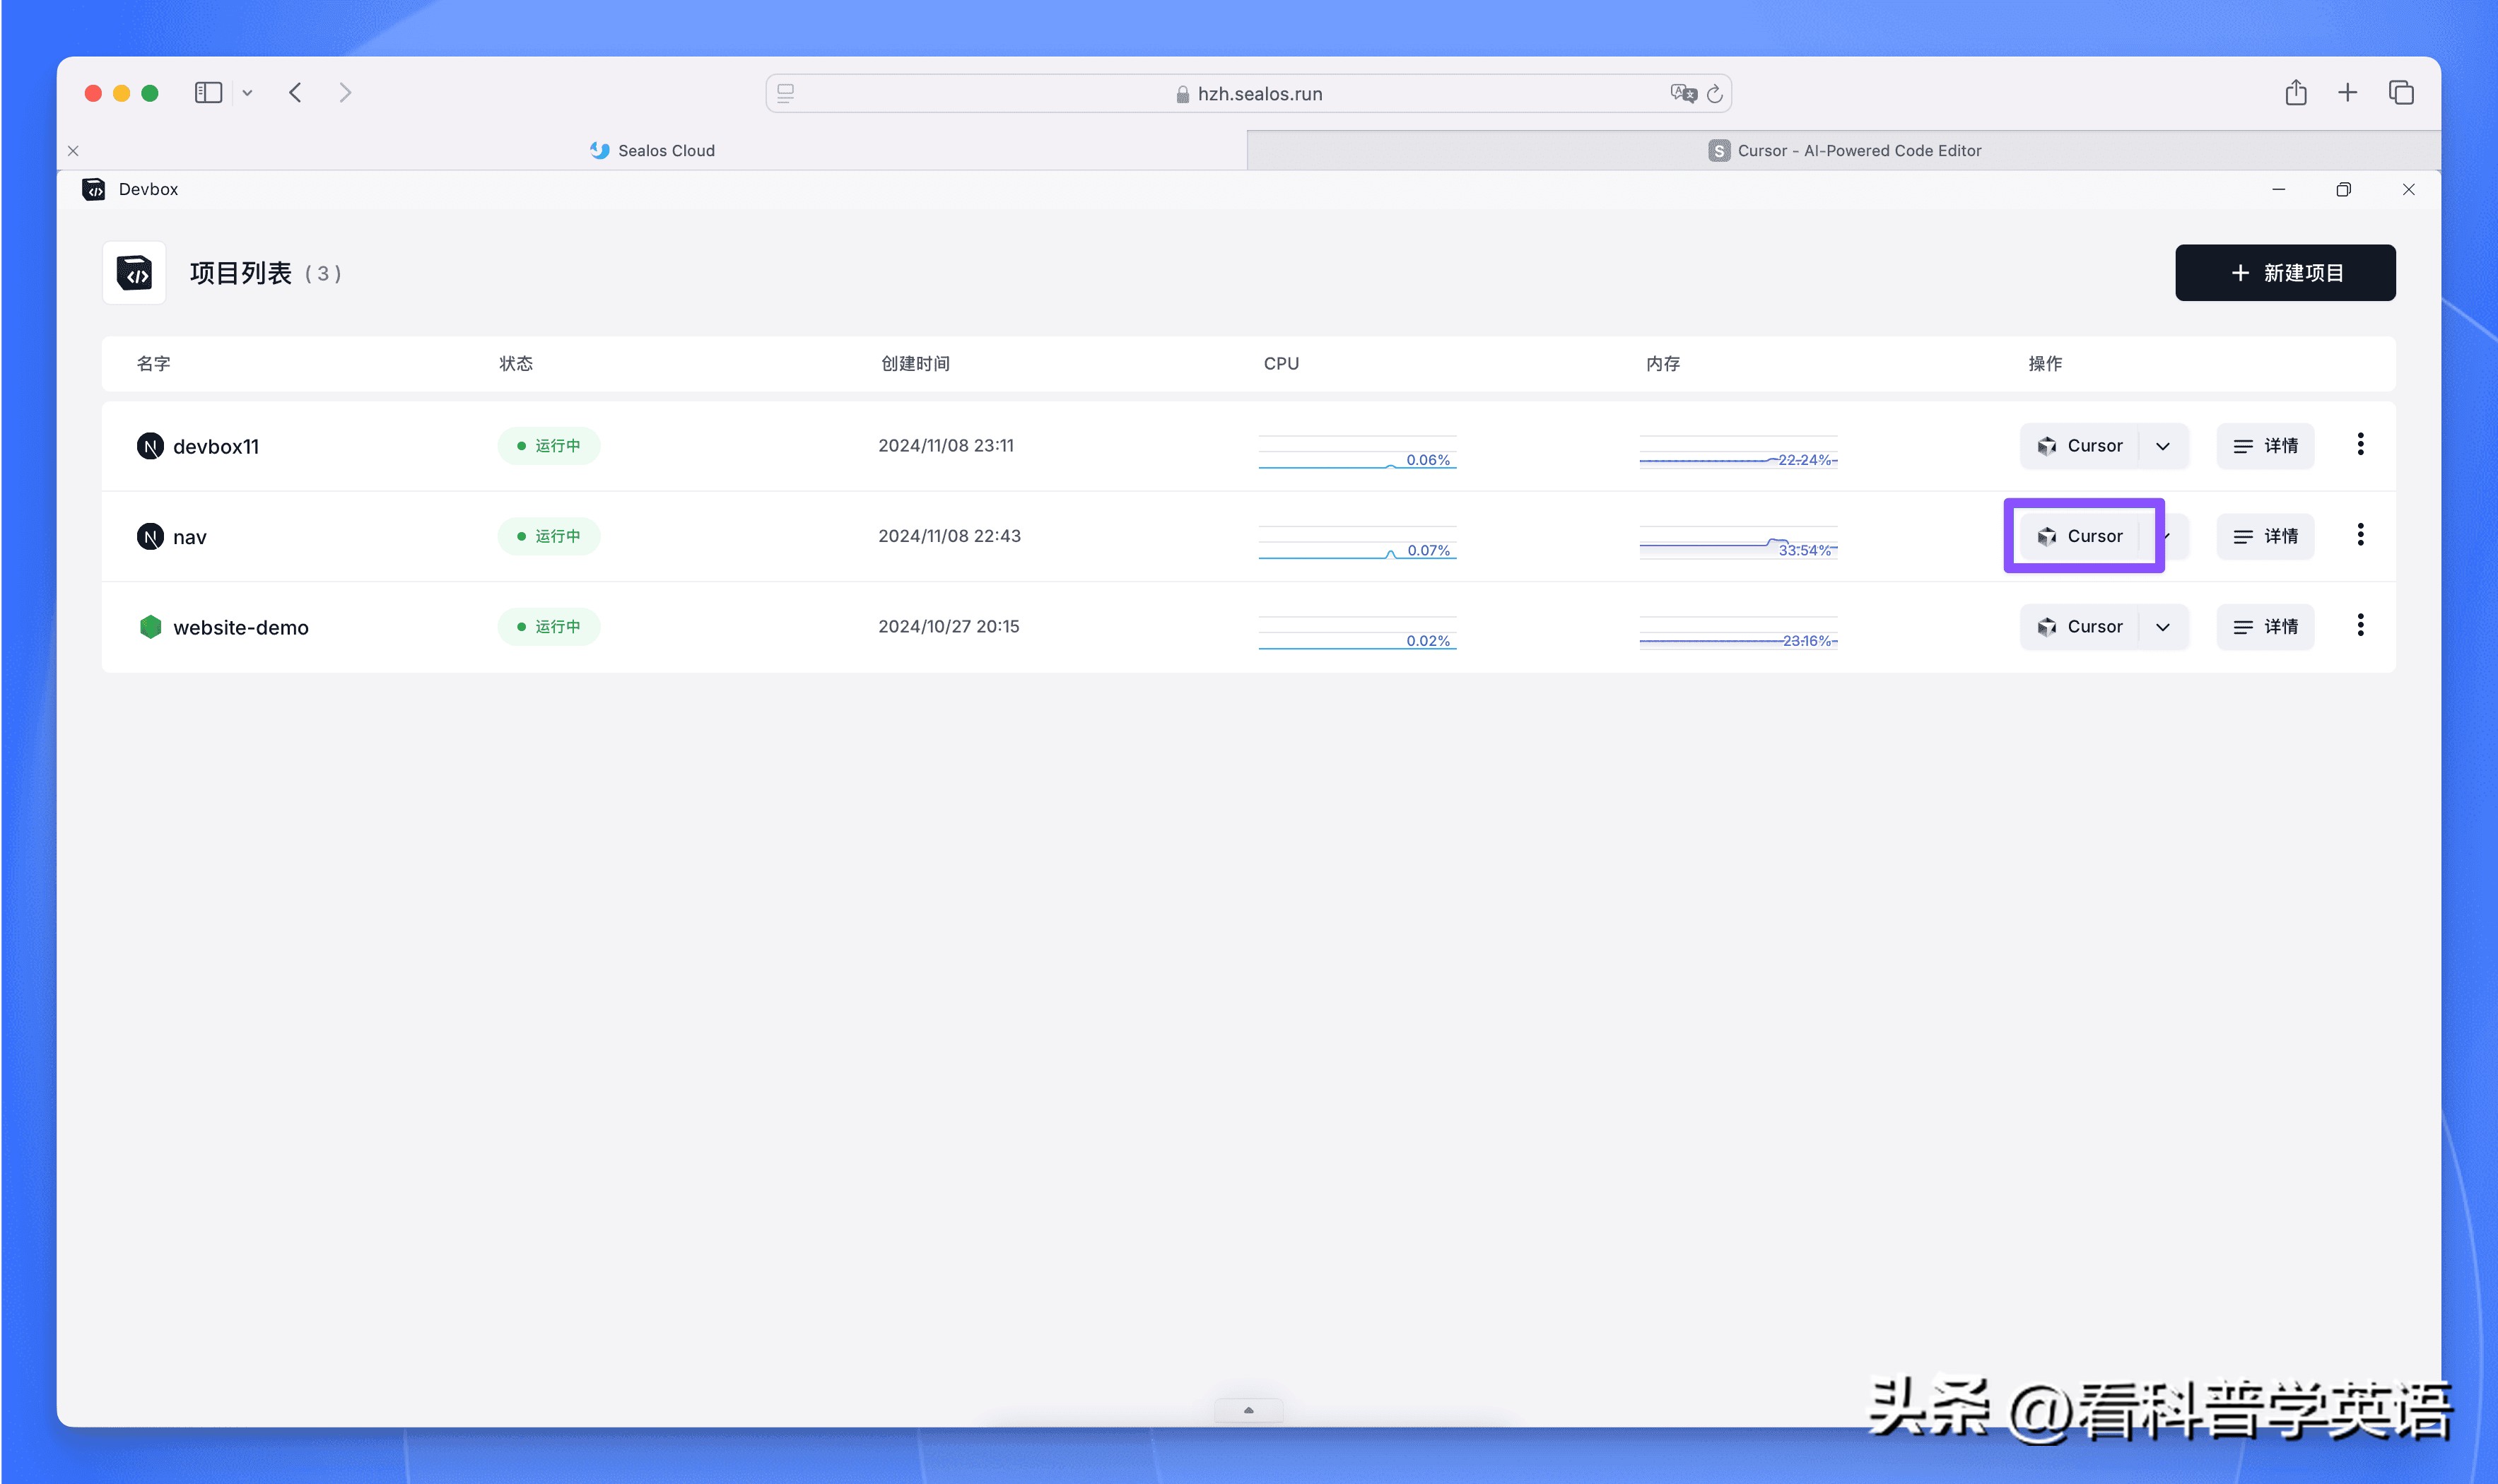
After the environment is ready, we connect to it using Cursor. In the operation options, select to connect with Cursor:

The first time you open it, you will be prompted to install the Devbox plugin, which will automatically connect to the development environment after installation.
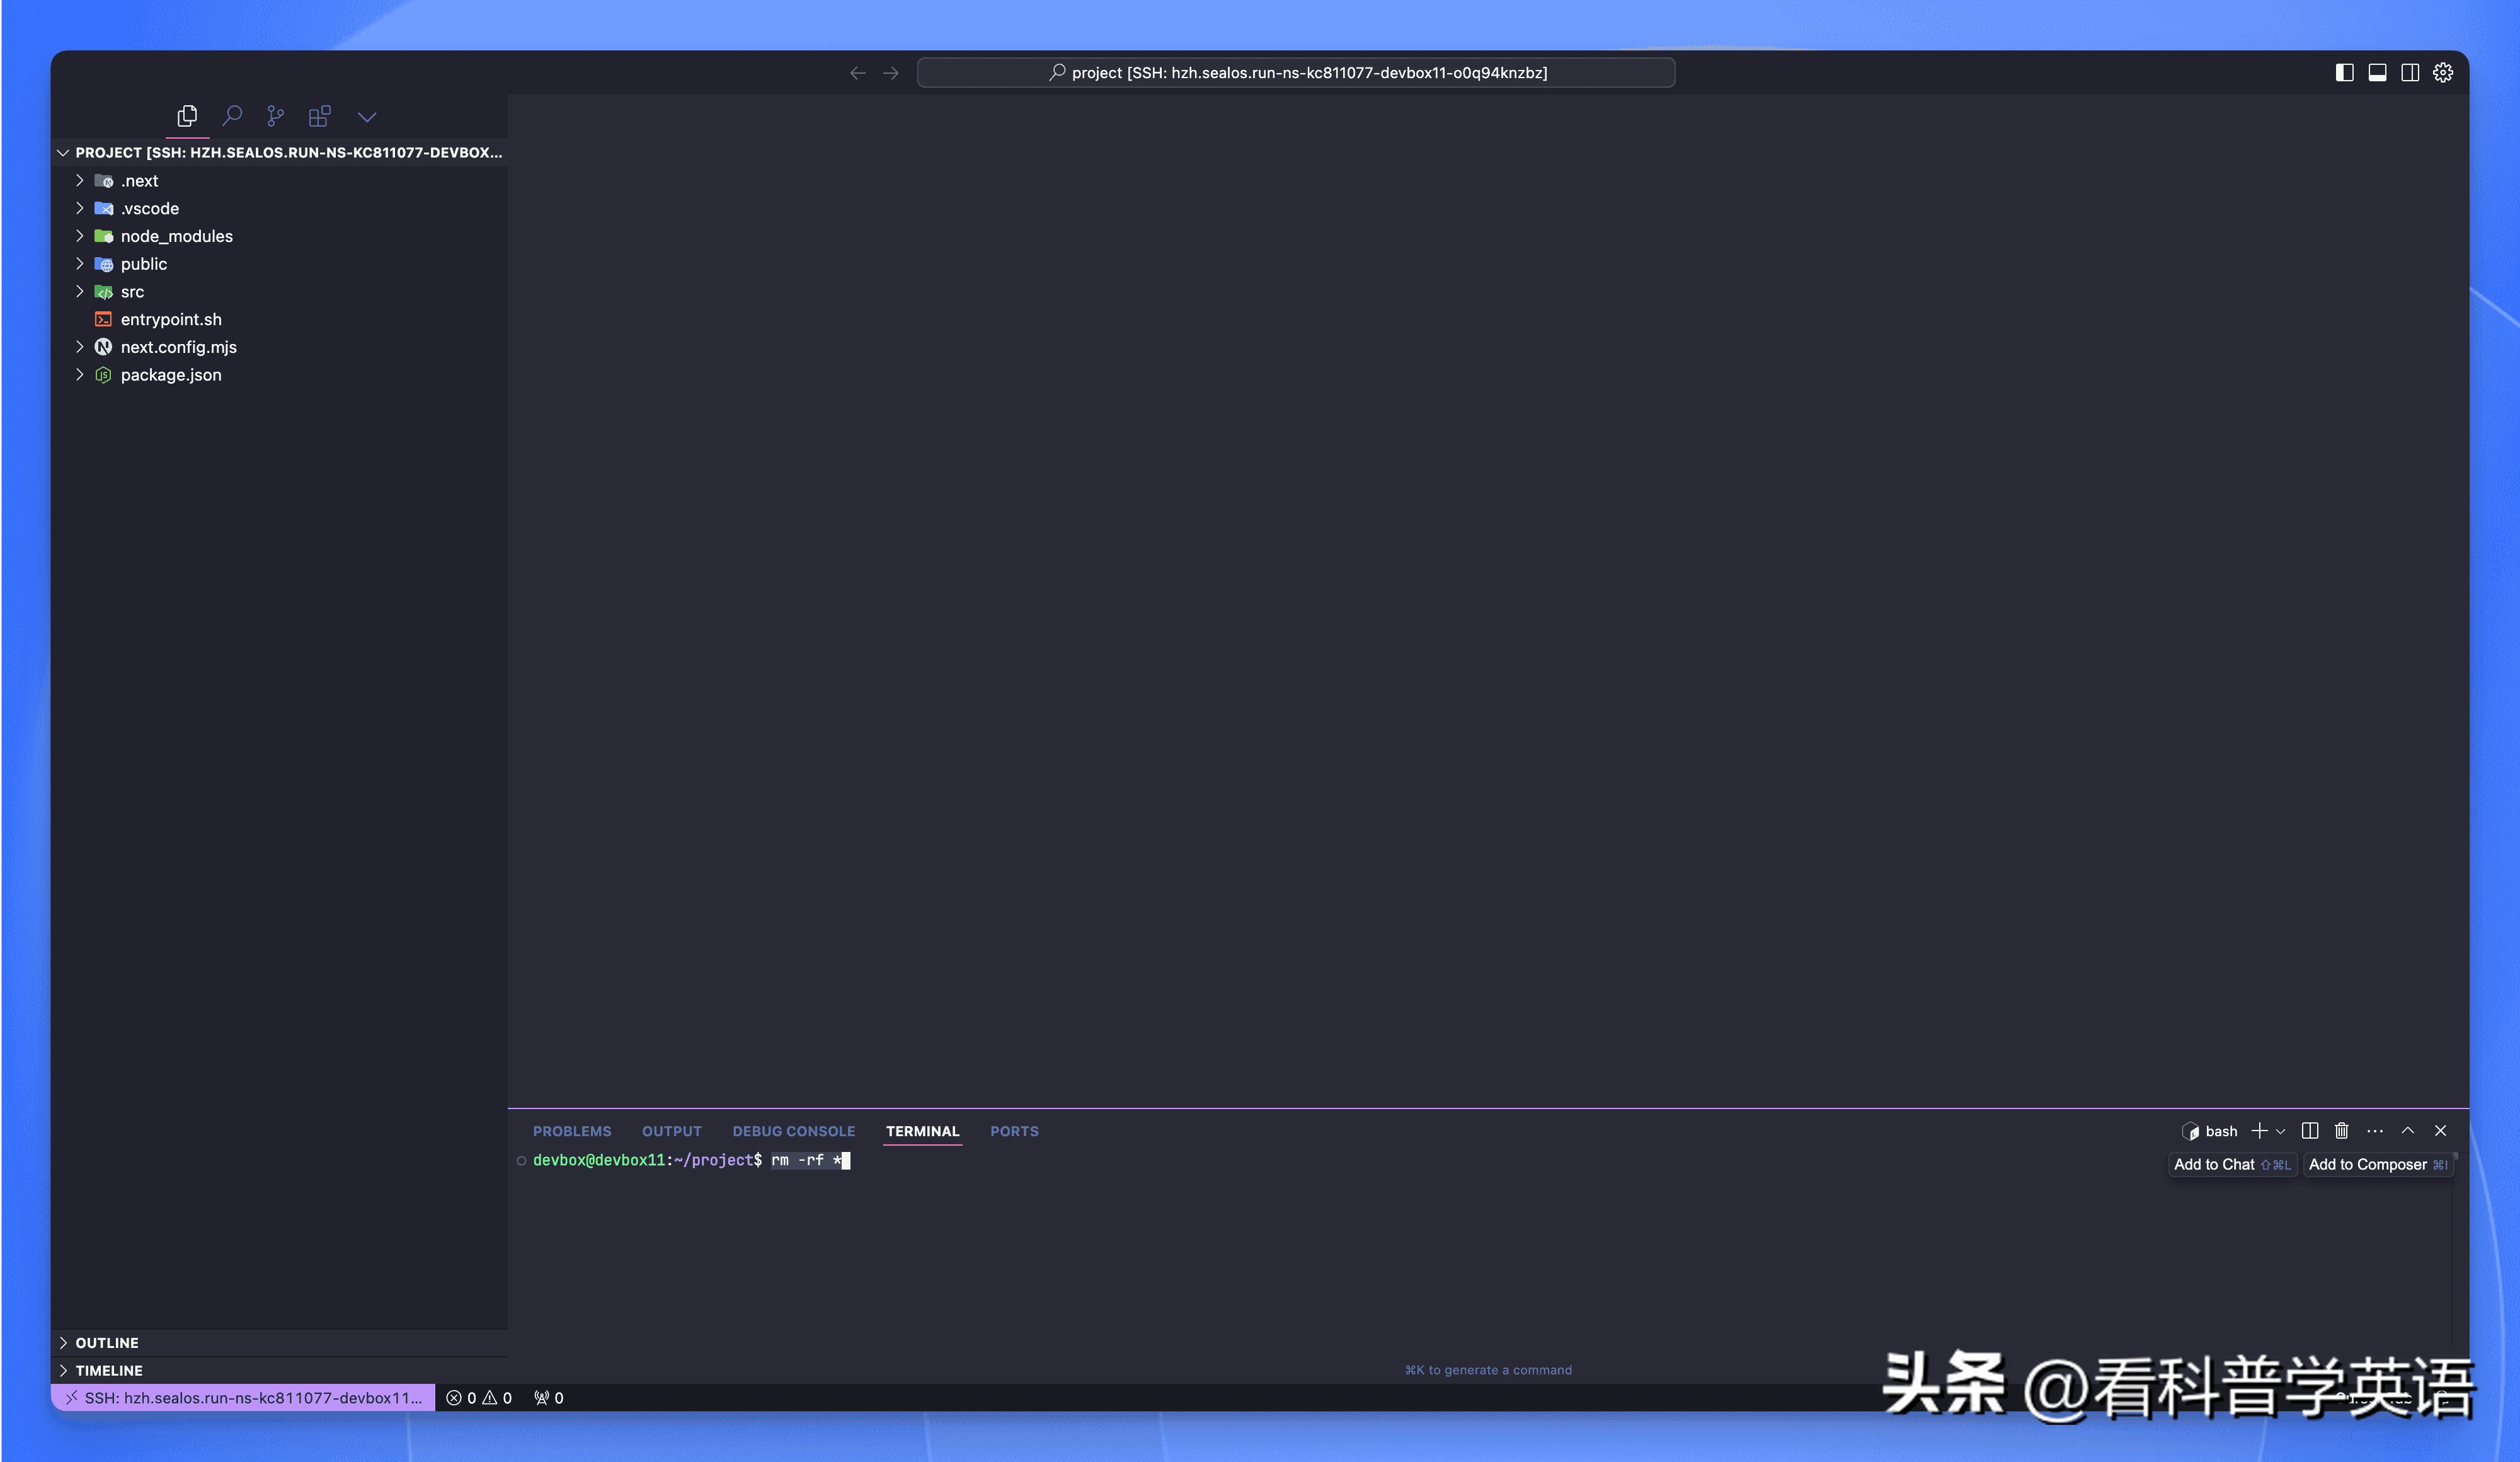
Open the Cursor terminal and delete all files in the project root directory:
Initializing the Project
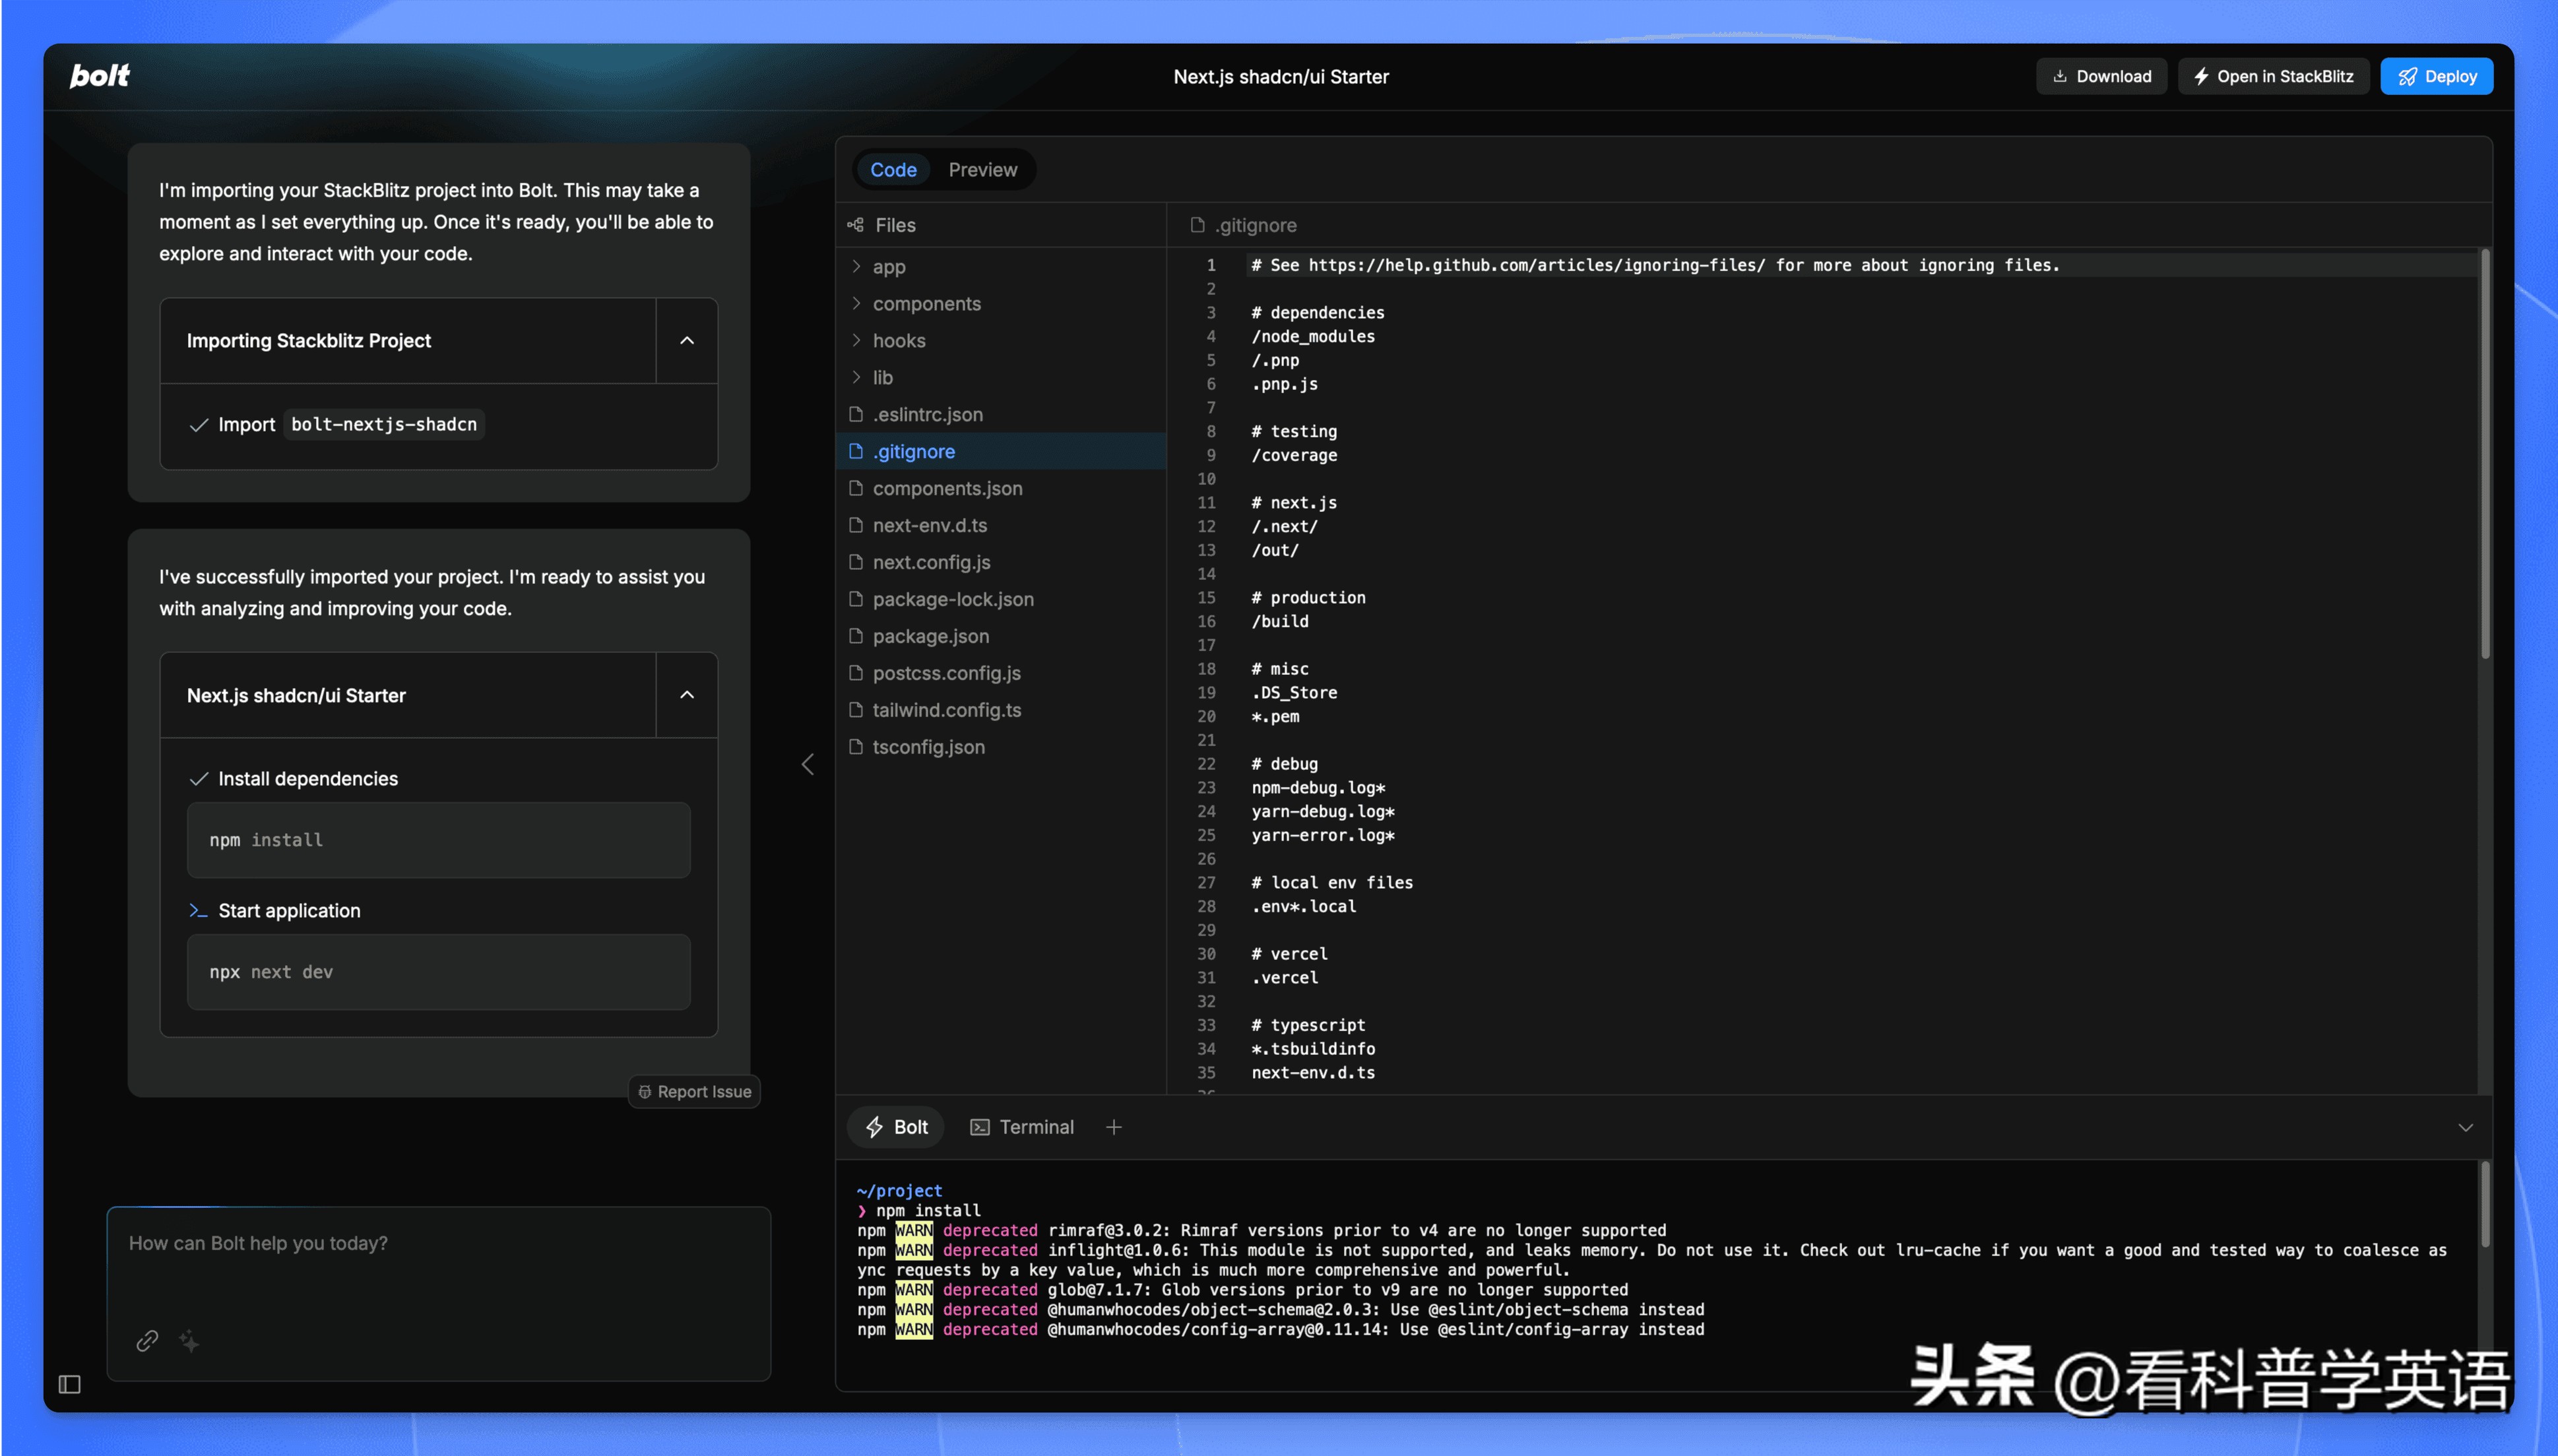
Recently, a new AI-driven full-stack development platform called Bolt.new has emerged, integrating a terminal and editor, making it a competitor to Cursor.
However, Bolt.new is web-based, which somewhat disconnects the experience from local IDE development, but it’s excellent for initializing projects.
While using Cursor to build a project from scratch is powerful, Bolt.new’s initialized front-end UI is visually more appealing than Cursor’s.
So, we can first use Bolt.new to initialize the project and then import it into Cursor for development—genius!
Let’s look at the practical steps.
First, visit the Bolt.new website[3]:

Here, you can either enter prompts to initialize your project or select your preferred tech stack under “or start a blank app with your favorite stack” and click on it.
I chose Next.js, and the project was initialized.
You can even preview it in real-time—how frustrating is that?
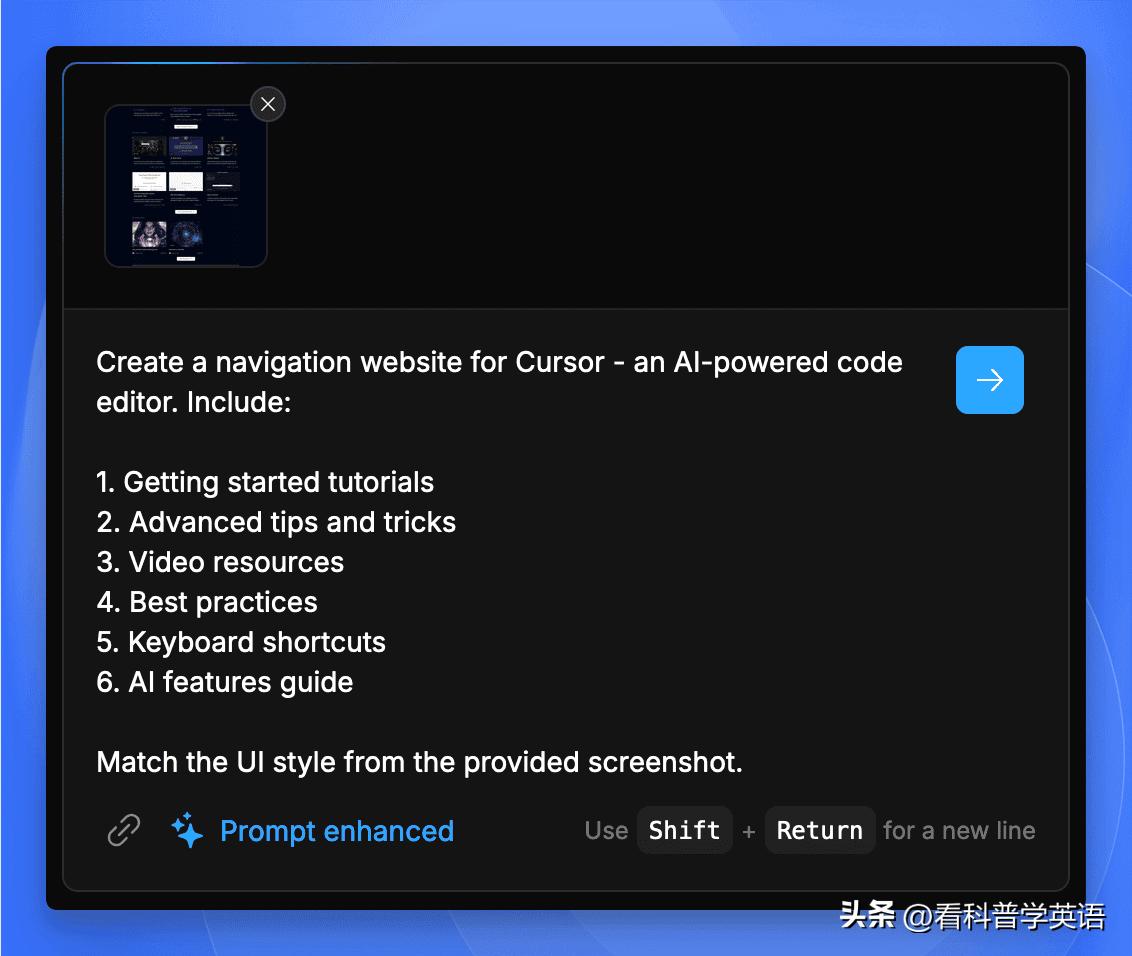
Next, it’s time to witness the magic. We will use this website as a reference: https://cursor101.com[4], and let Bolt.new generate a similar site. The prompt is as follows:
Generate a navigation site with a UI style consistent with the uploaded screenshot, themed around "Cursor: an AI-powered enhanced code editor" with various tutorials, practical tips, and video resources.
After uploading the reference website screenshot and entering the prompt, click the “Enhance prompt” button below the input box and hit enter.
At this point, the AI starts generating the code—what a powerful operation!
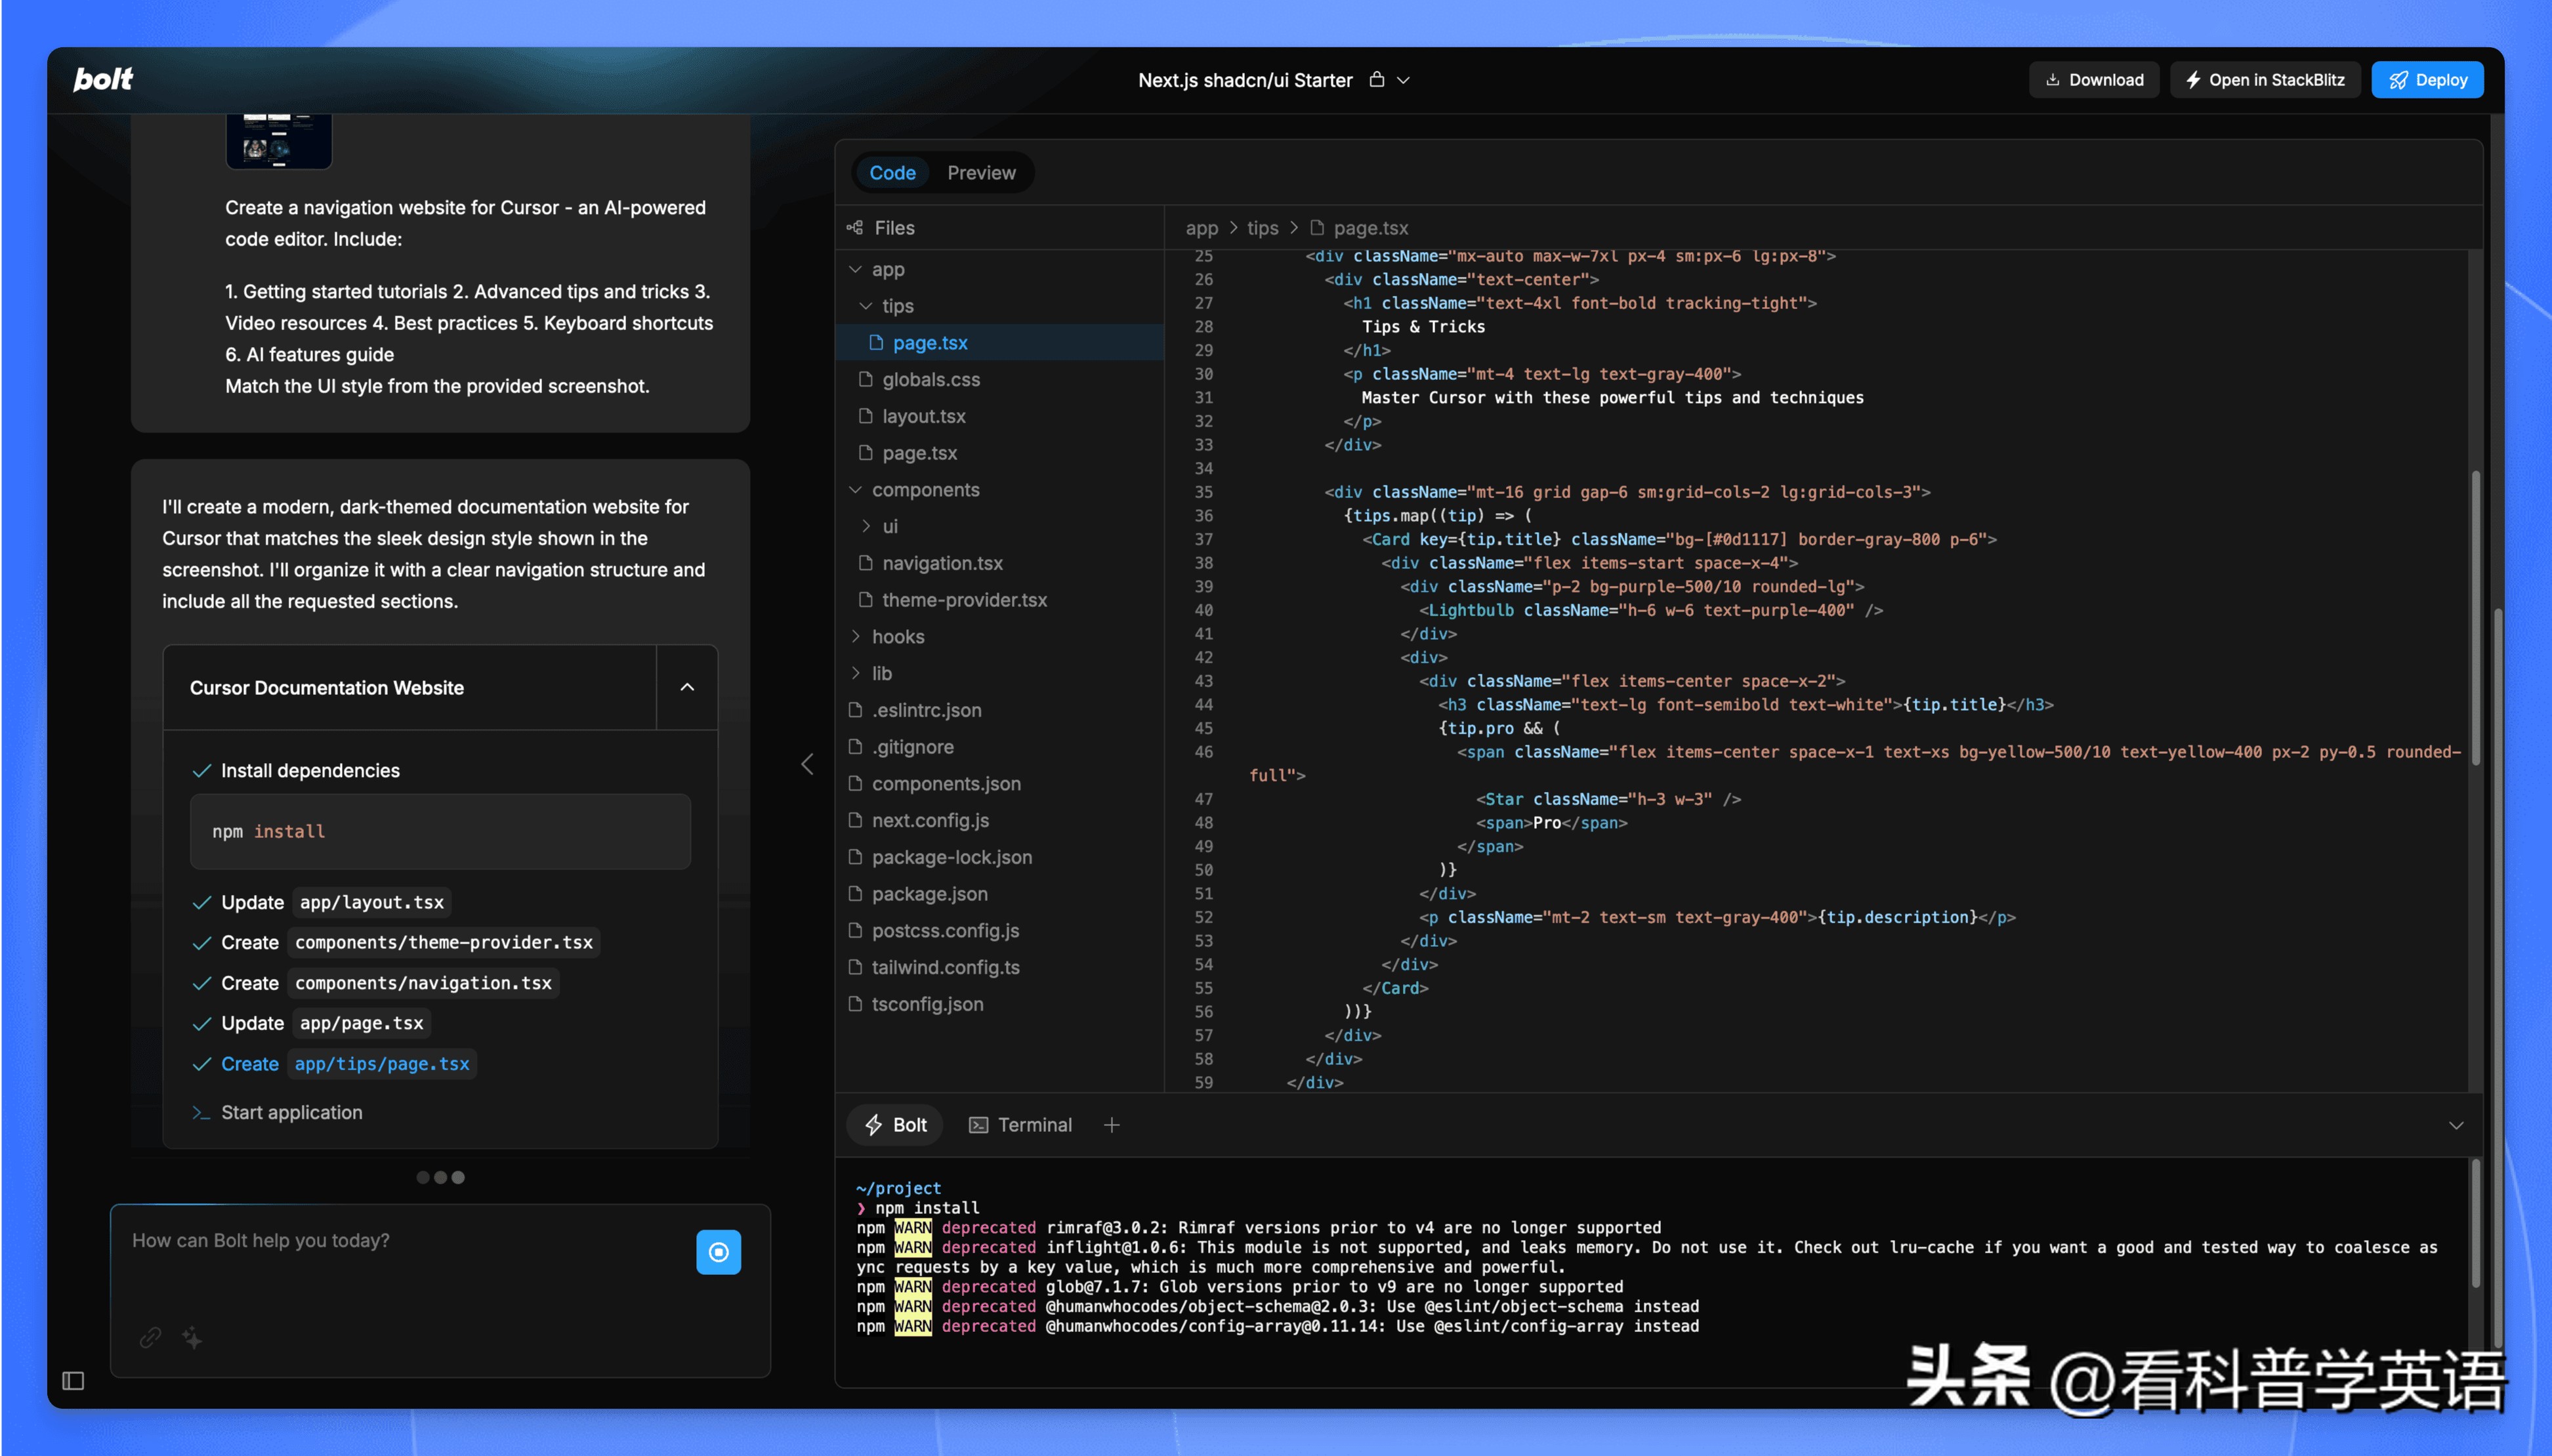
Once completed, it even launched the site and opened the preview interface for me…
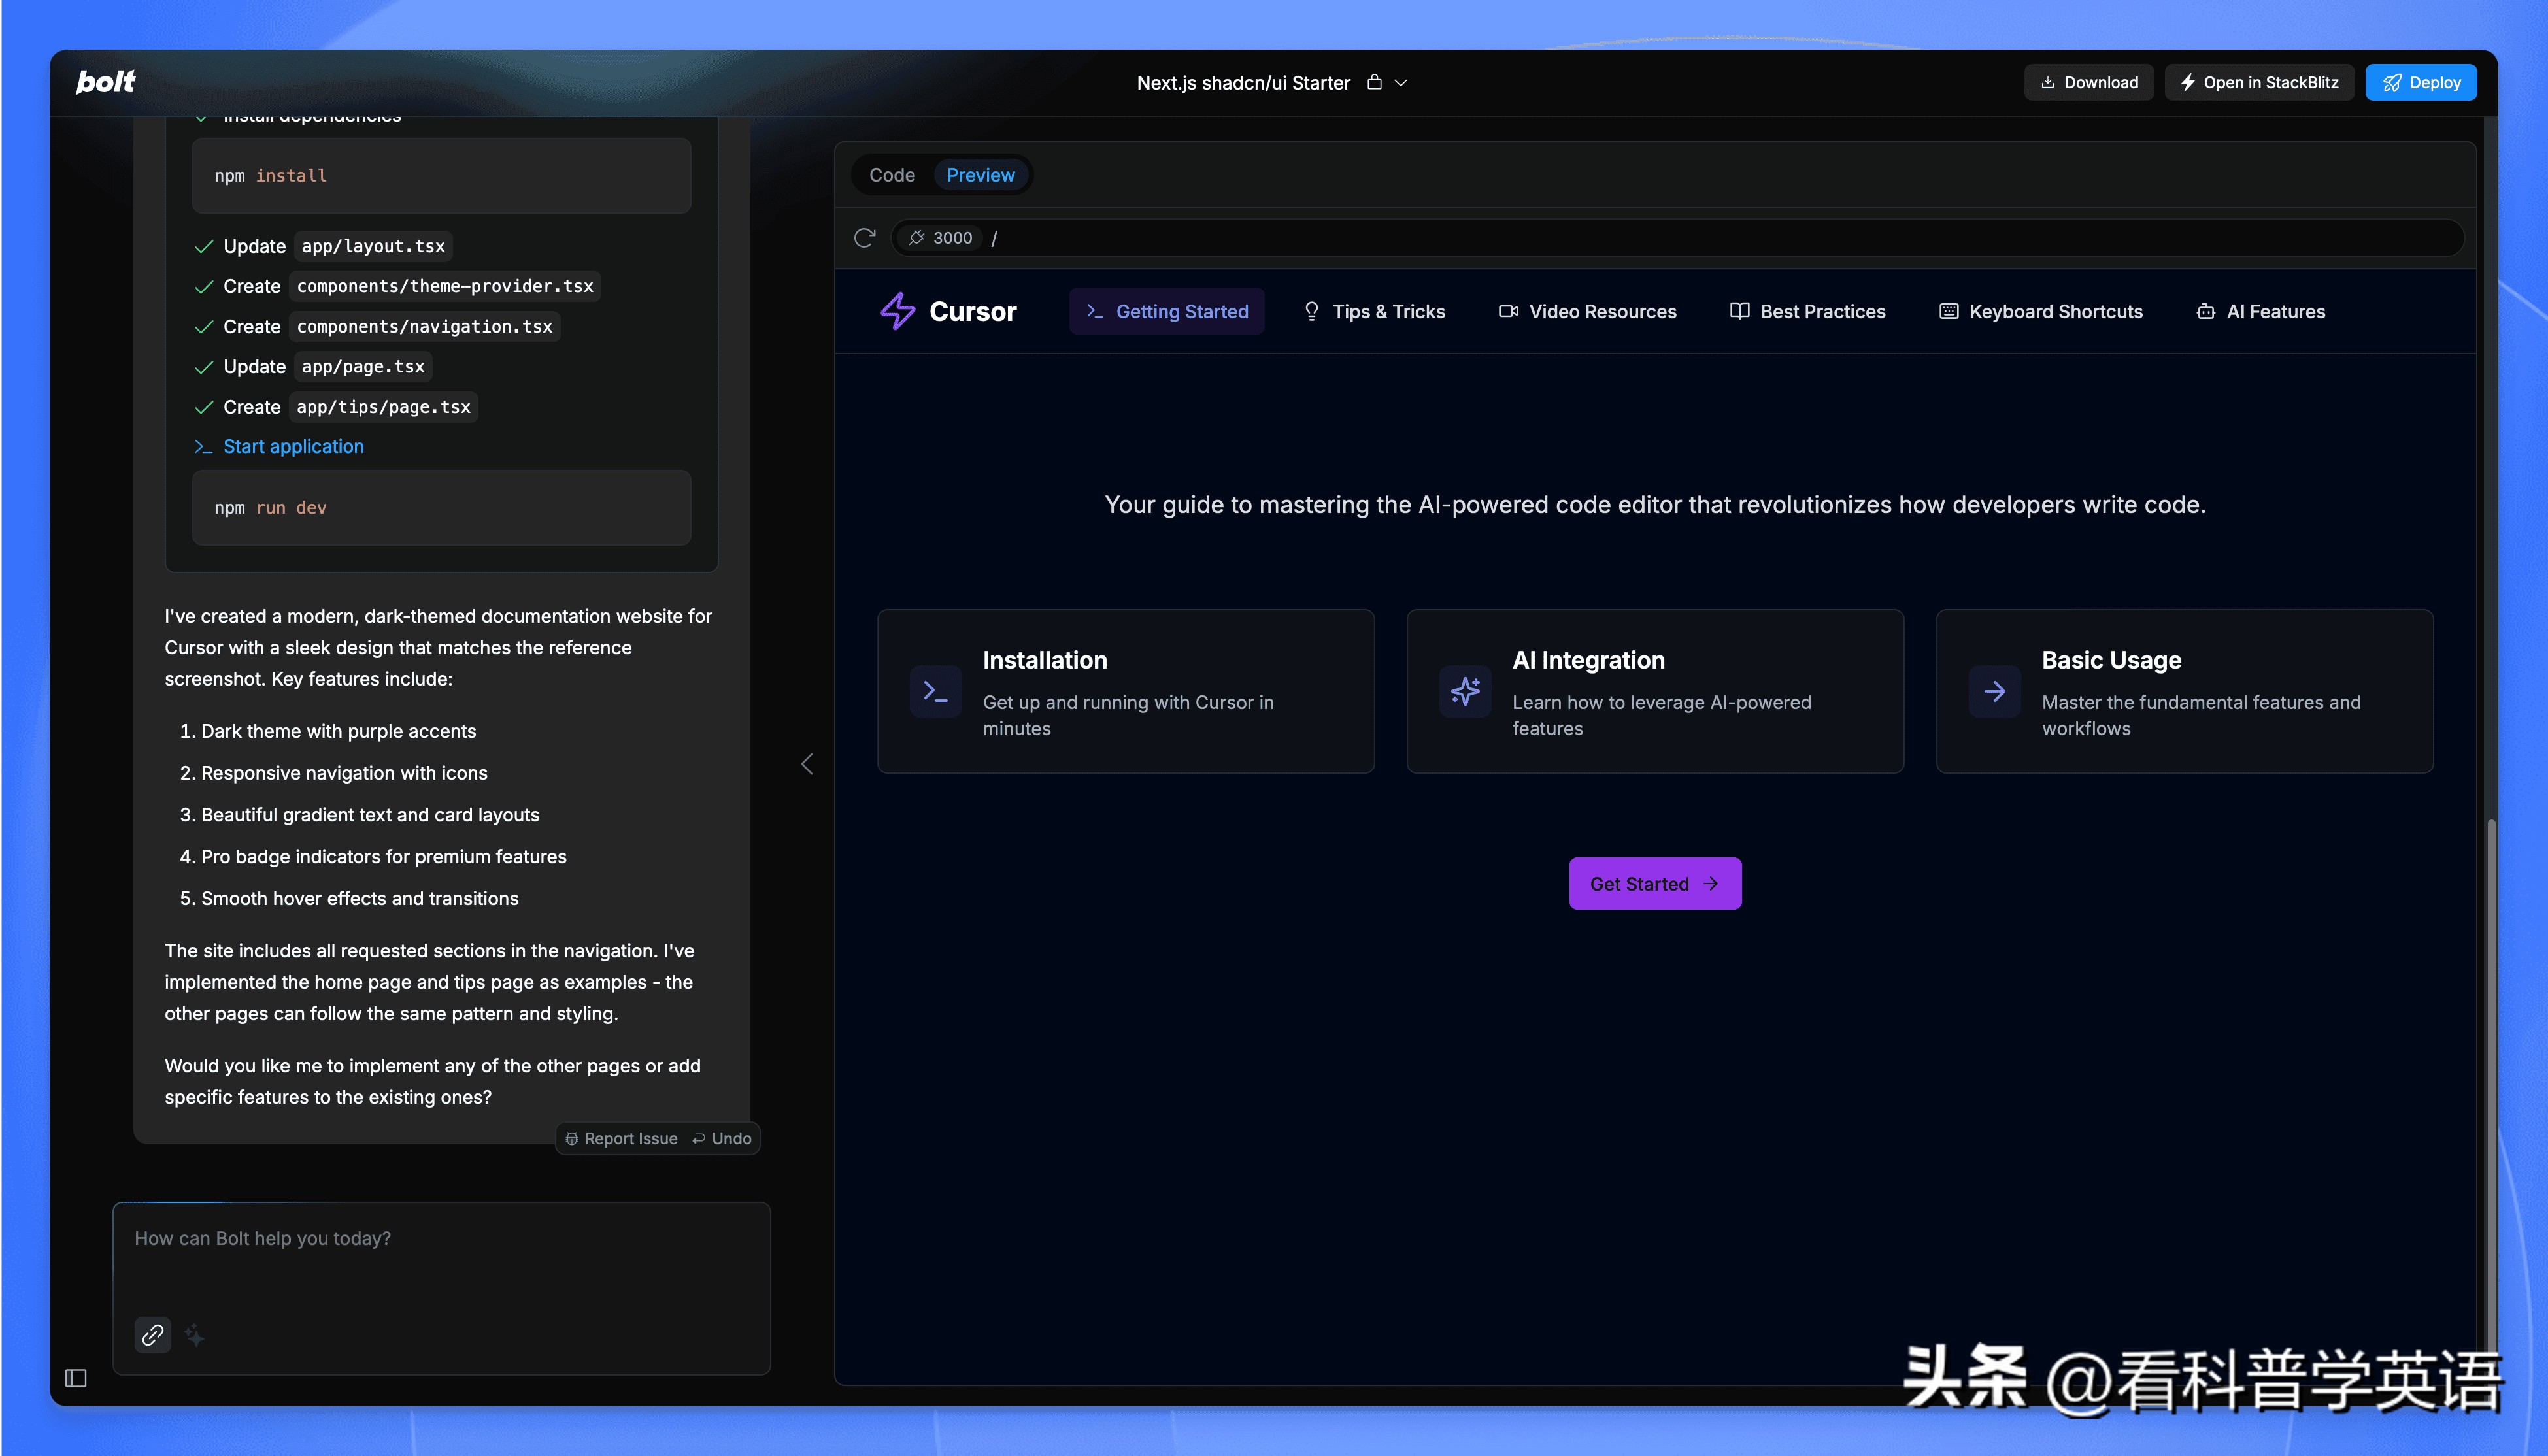
Wow, I just had to speak, and it even handled the launch for me.
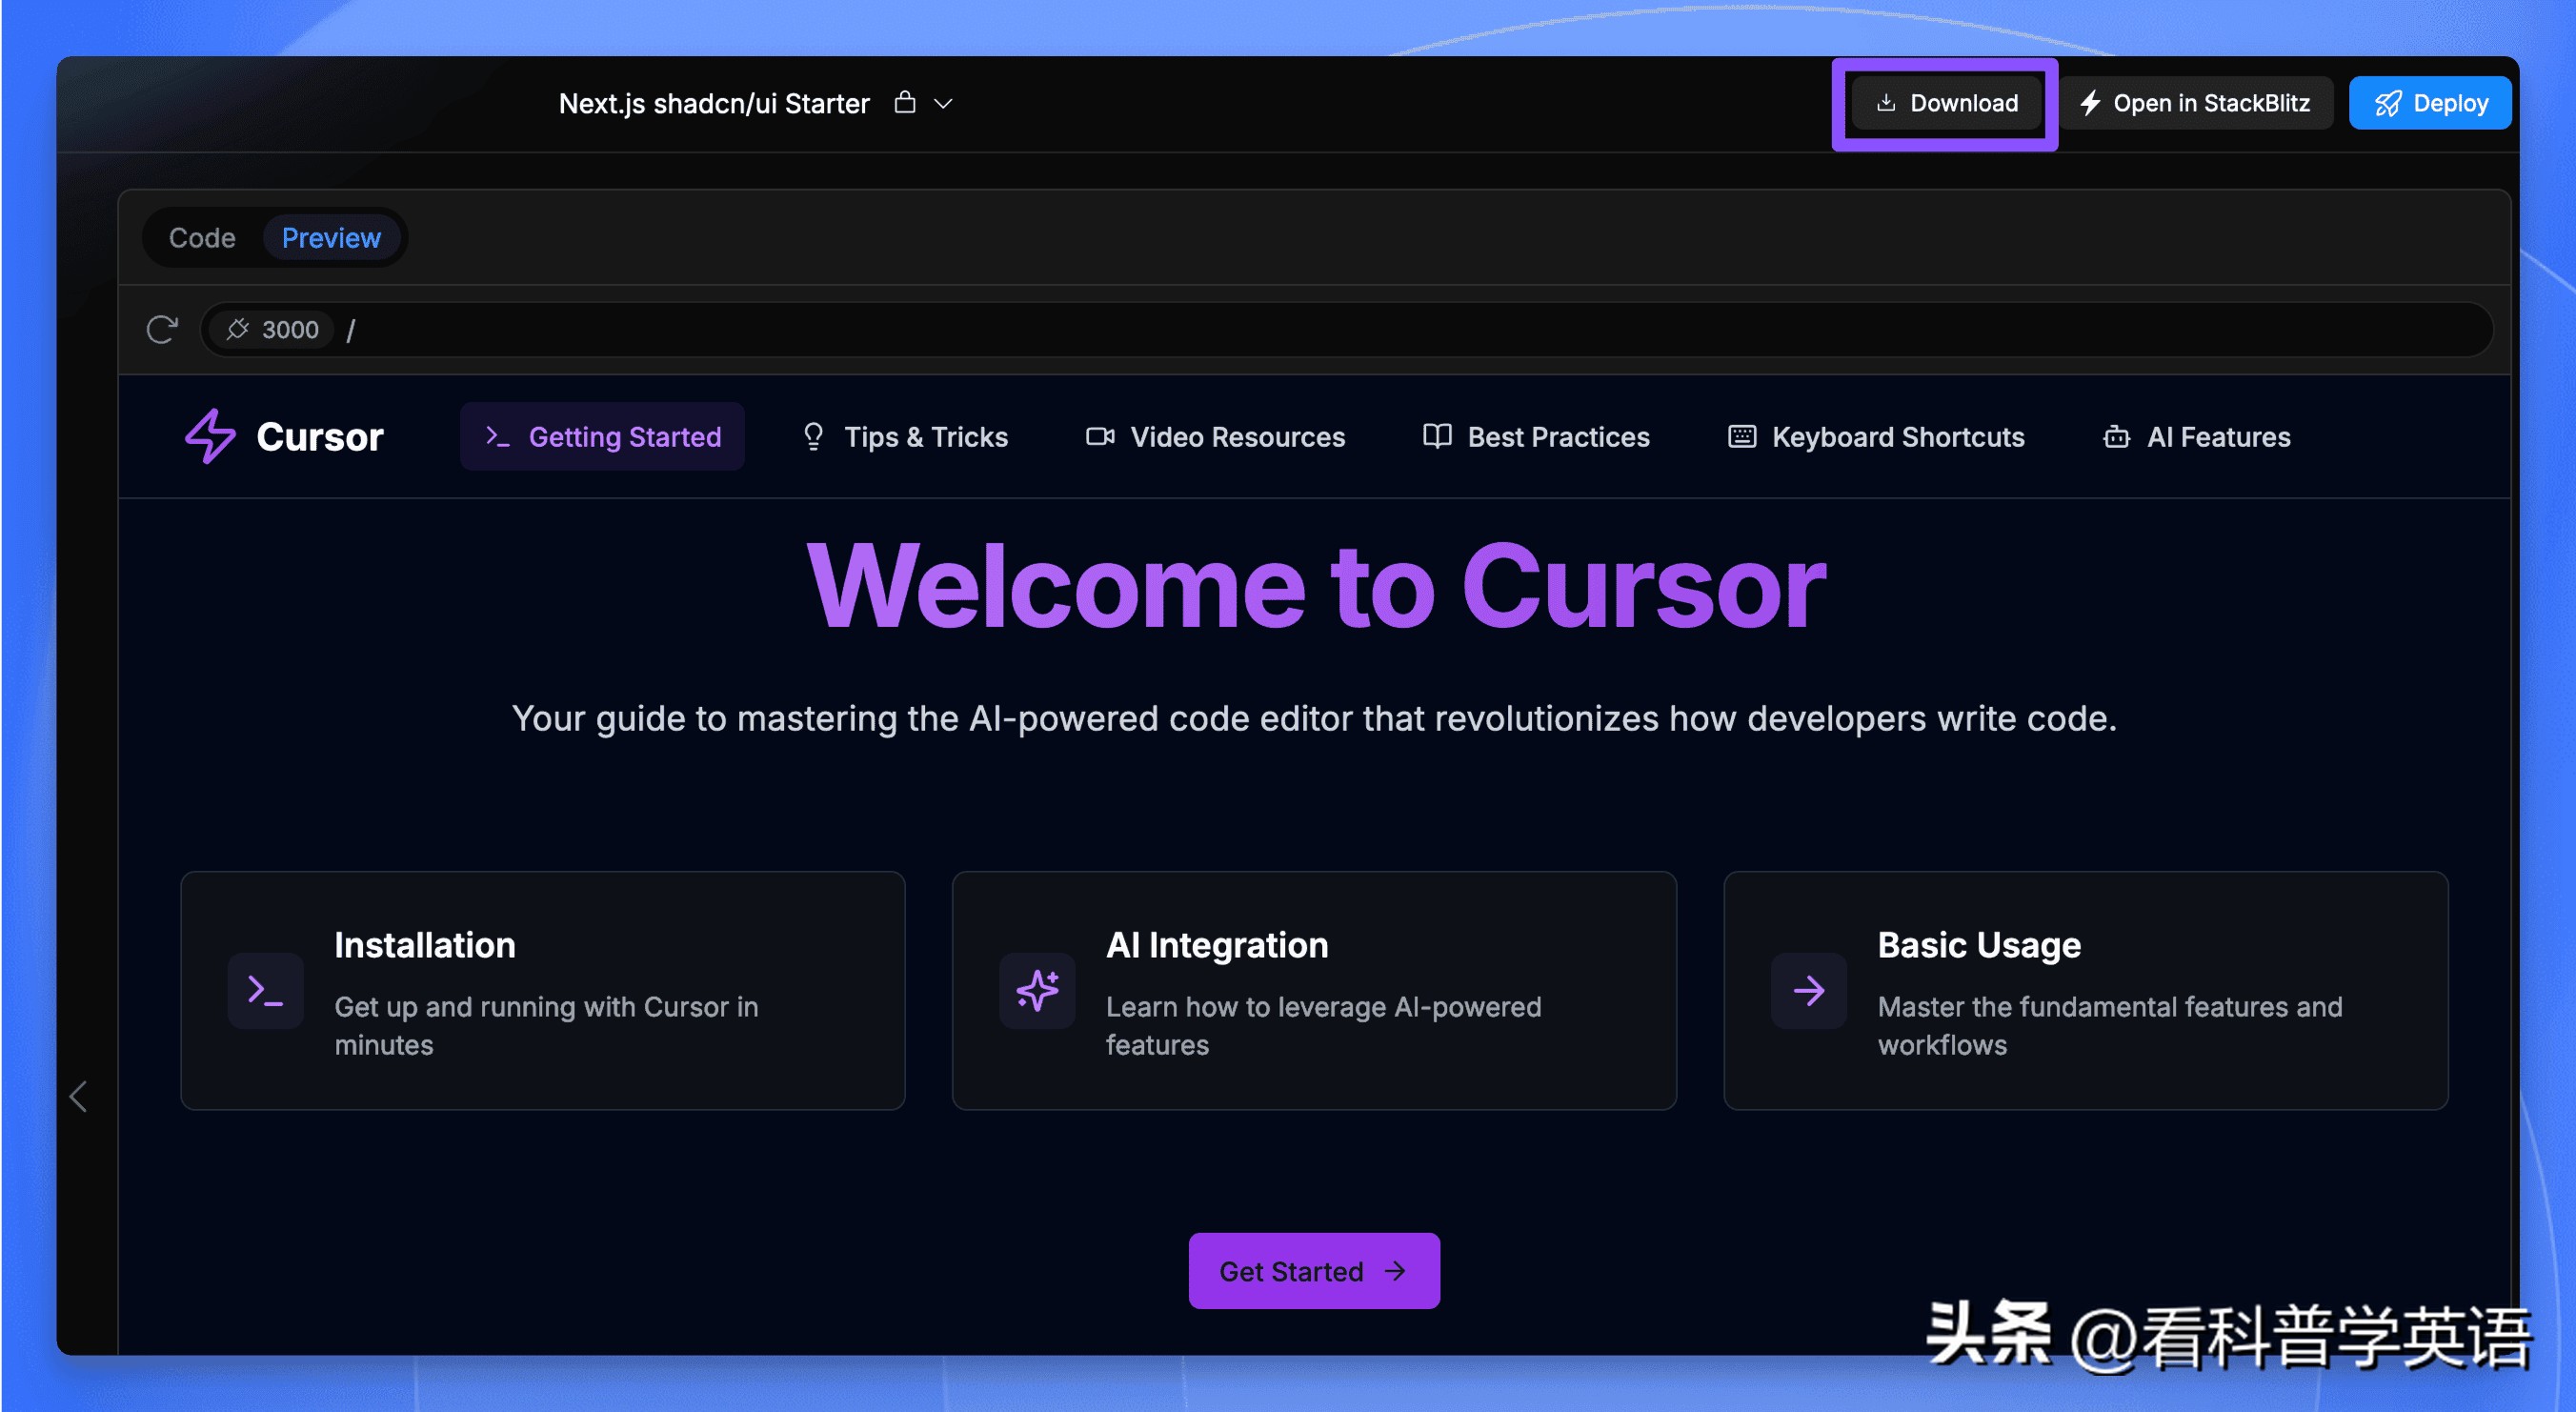
I might as well download the project code. Click the “Download” button in the upper right corner to download the project code zip file.
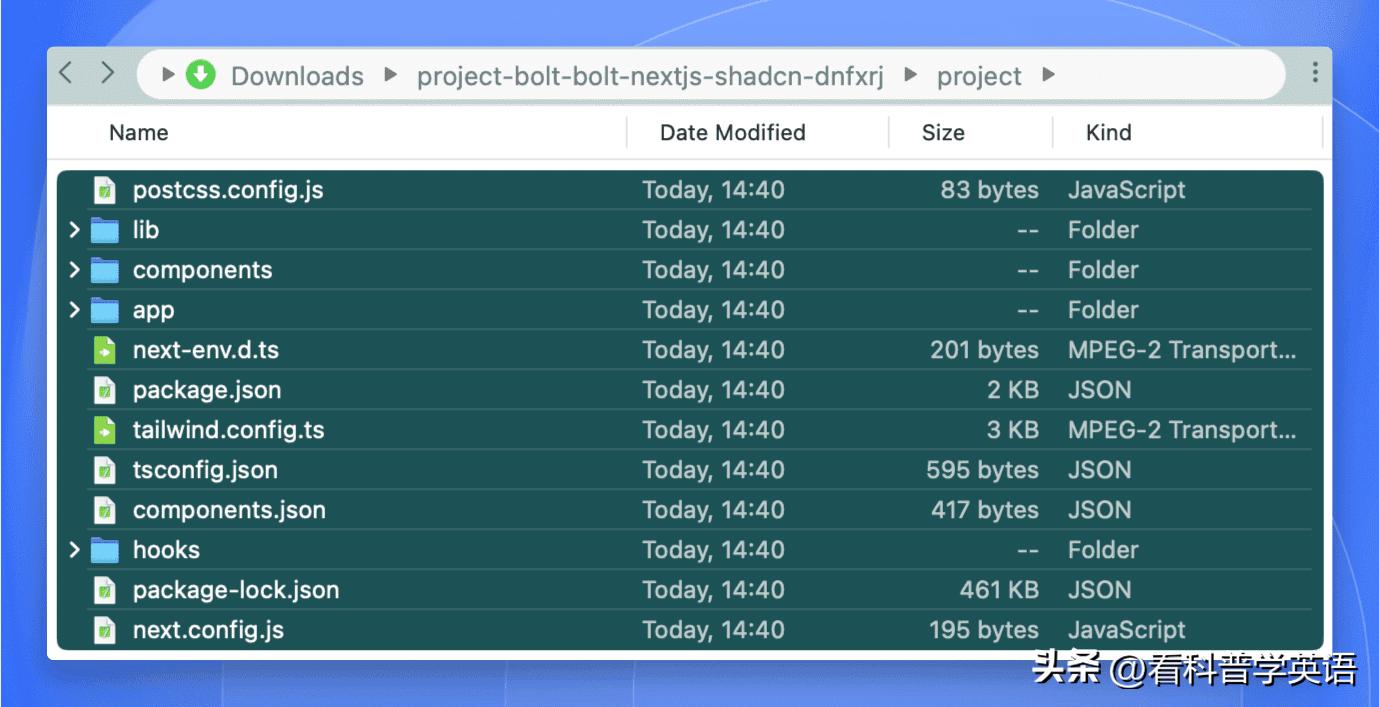
After downloading, unzip the file and open the project folder to see the project code ready for use.
Importing the Project into Cursor
Simply select all files in the project folder and drag them into the left file list of the Cursor code editor to import the entire project.
Then run npm install to install dependencies, and after that, execute npm run dev to start the project.
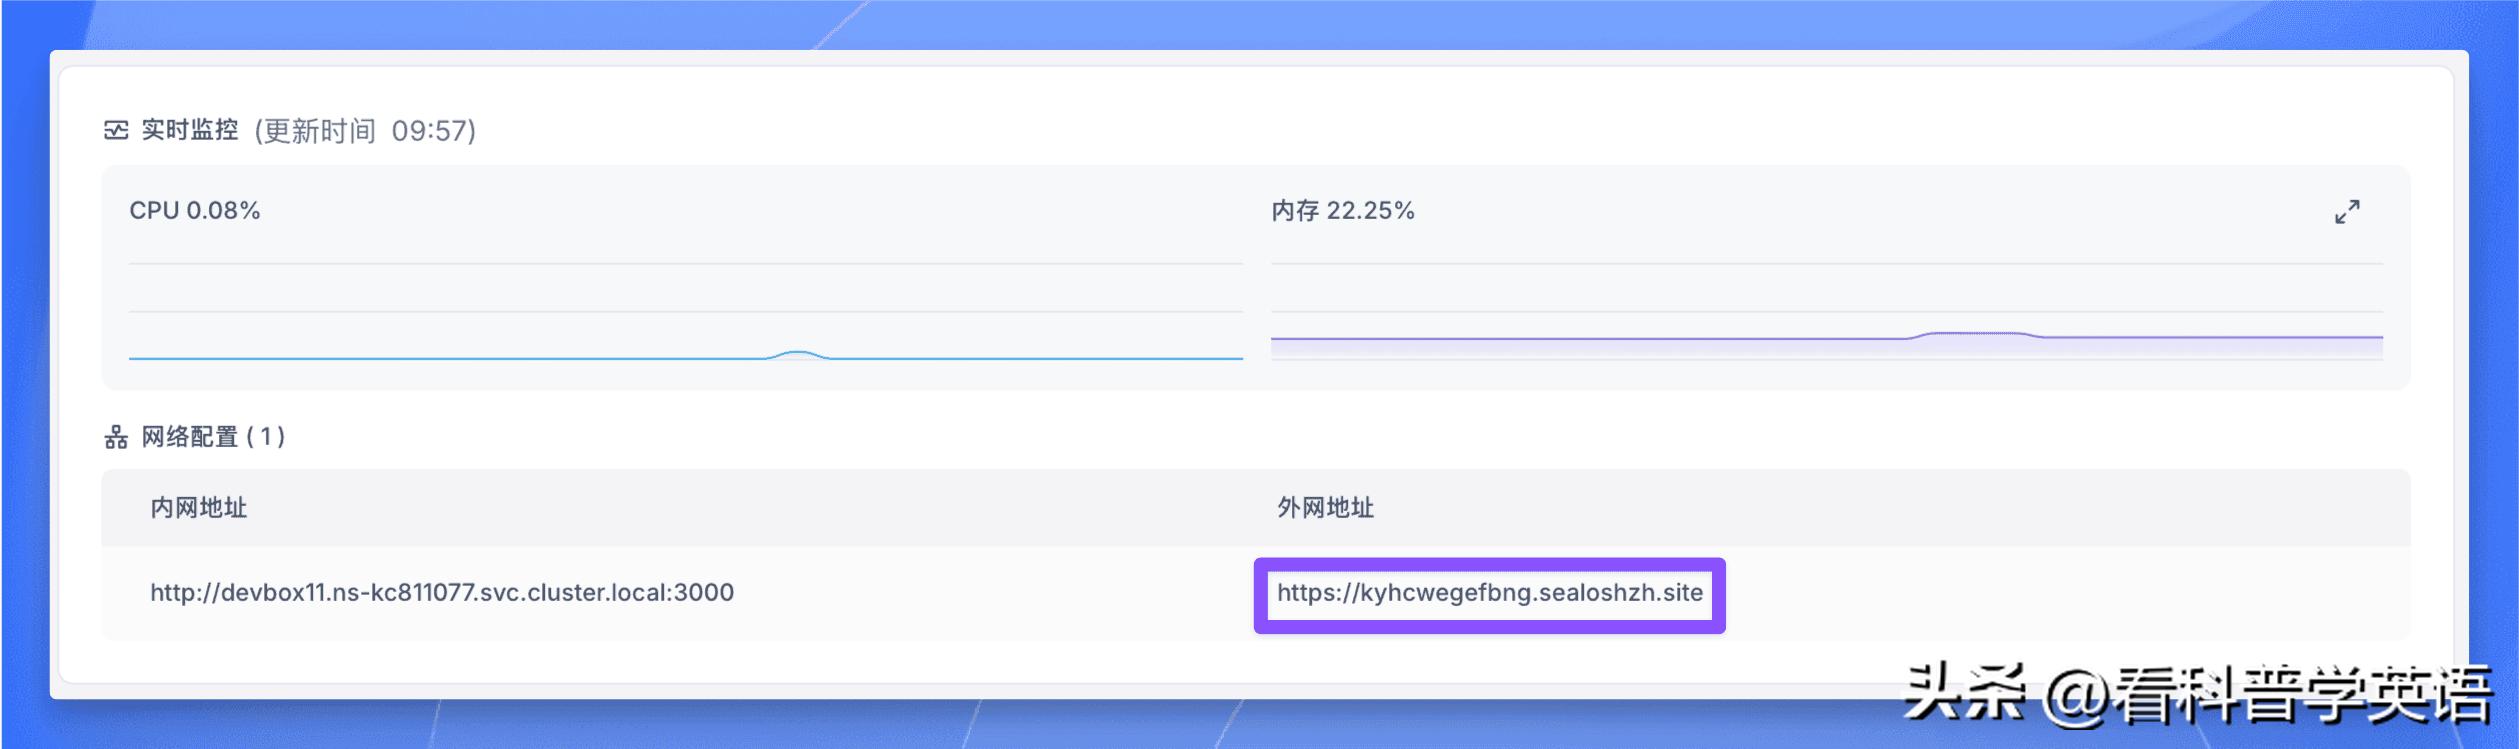
Now, return to the Devbox interface and access the details page of the Next.js development environment:
Click the external address to visit the website using the public domain name:
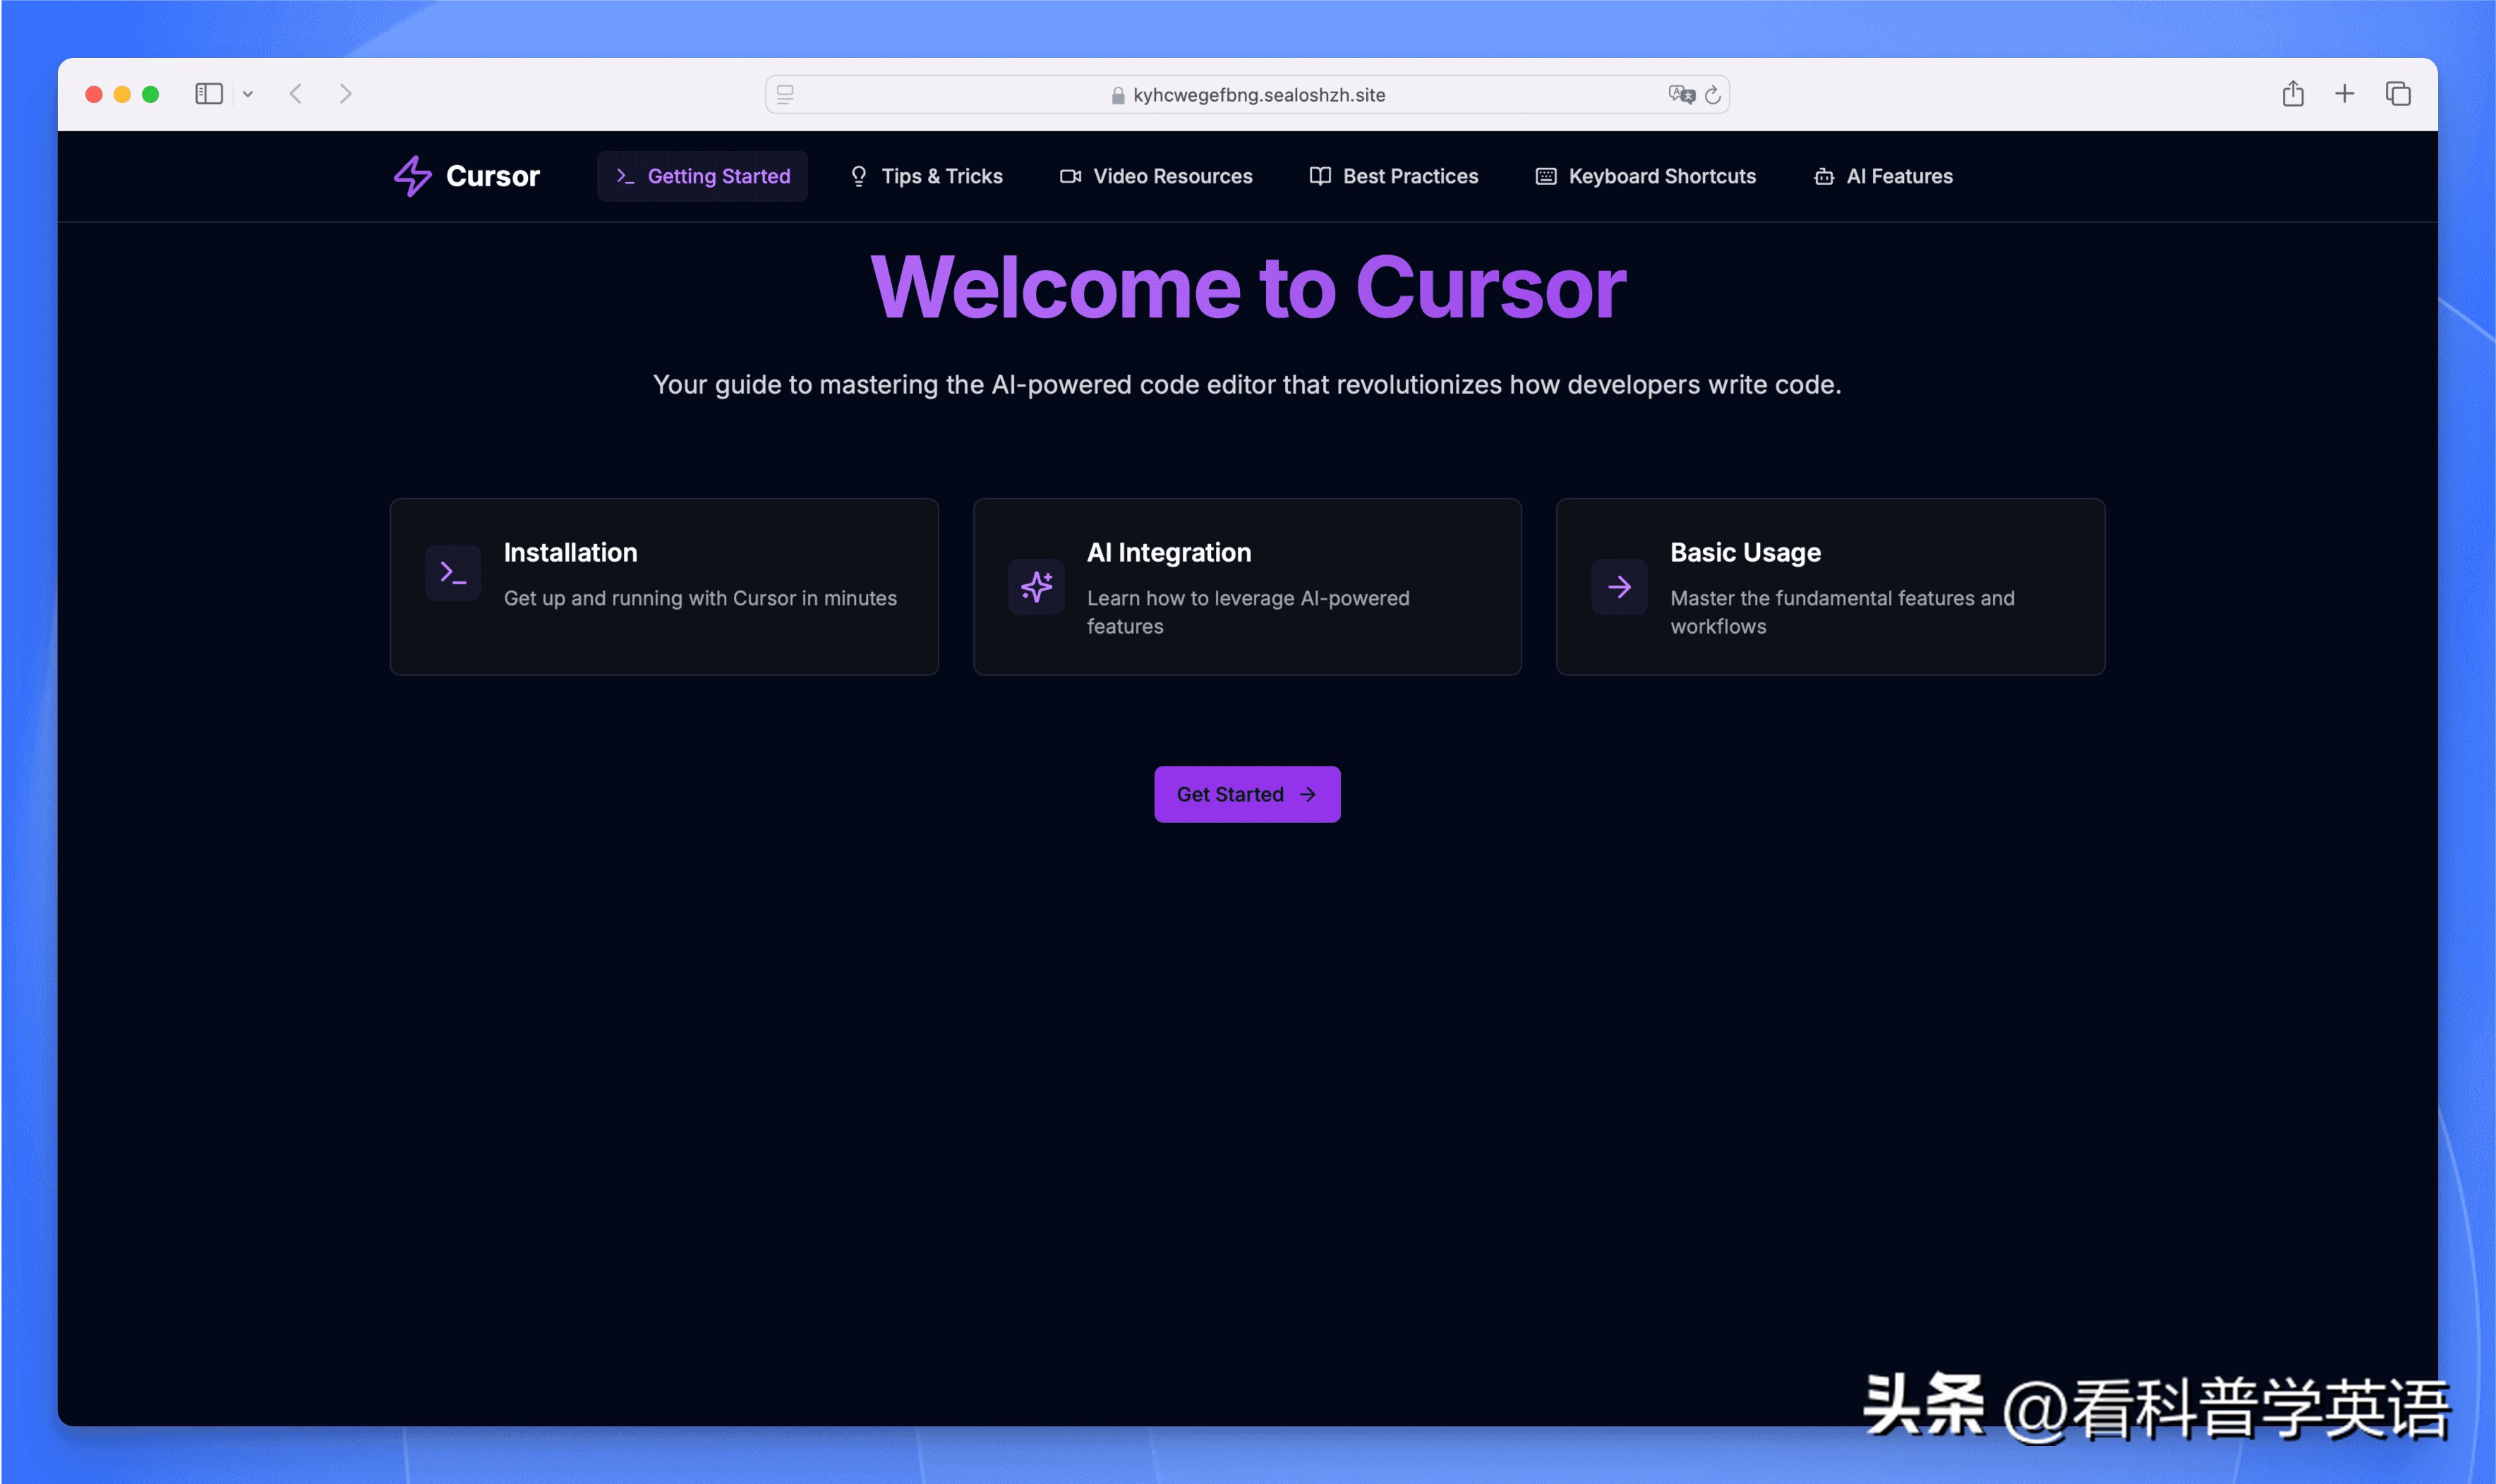
Perfect! Now, let’s continue developing this website using Cursor.
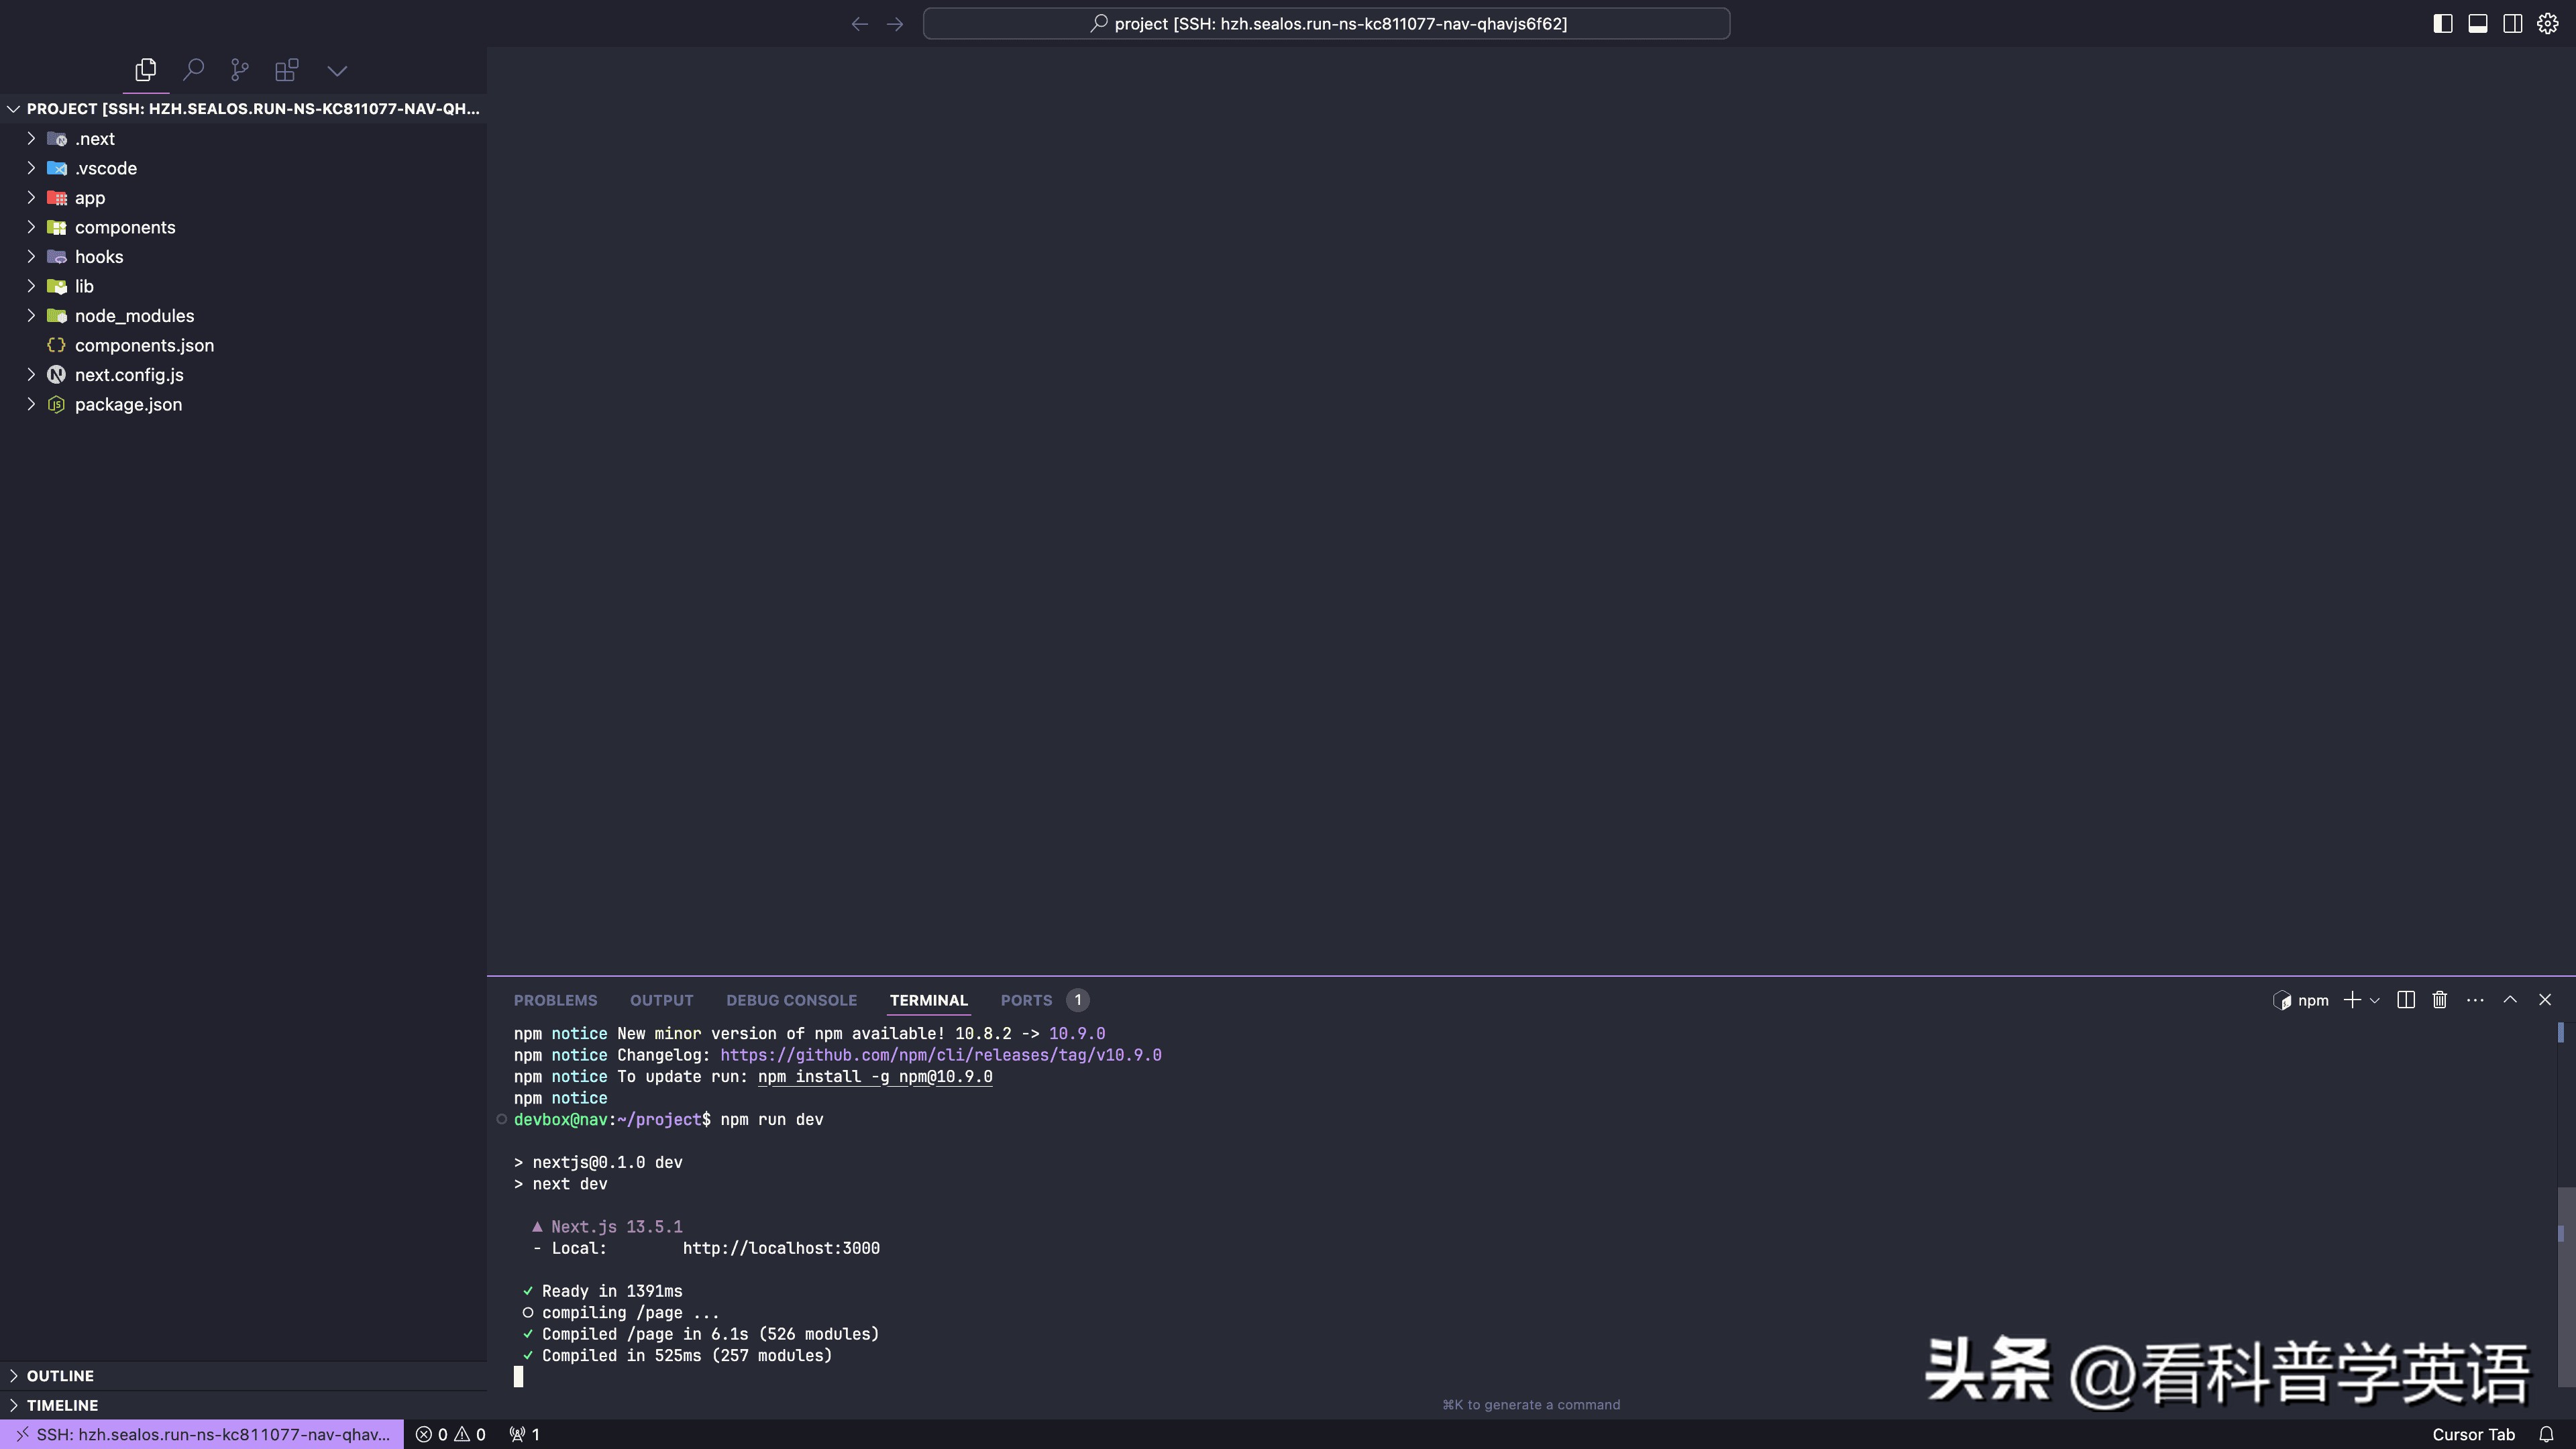
Continuing Development with Cursor
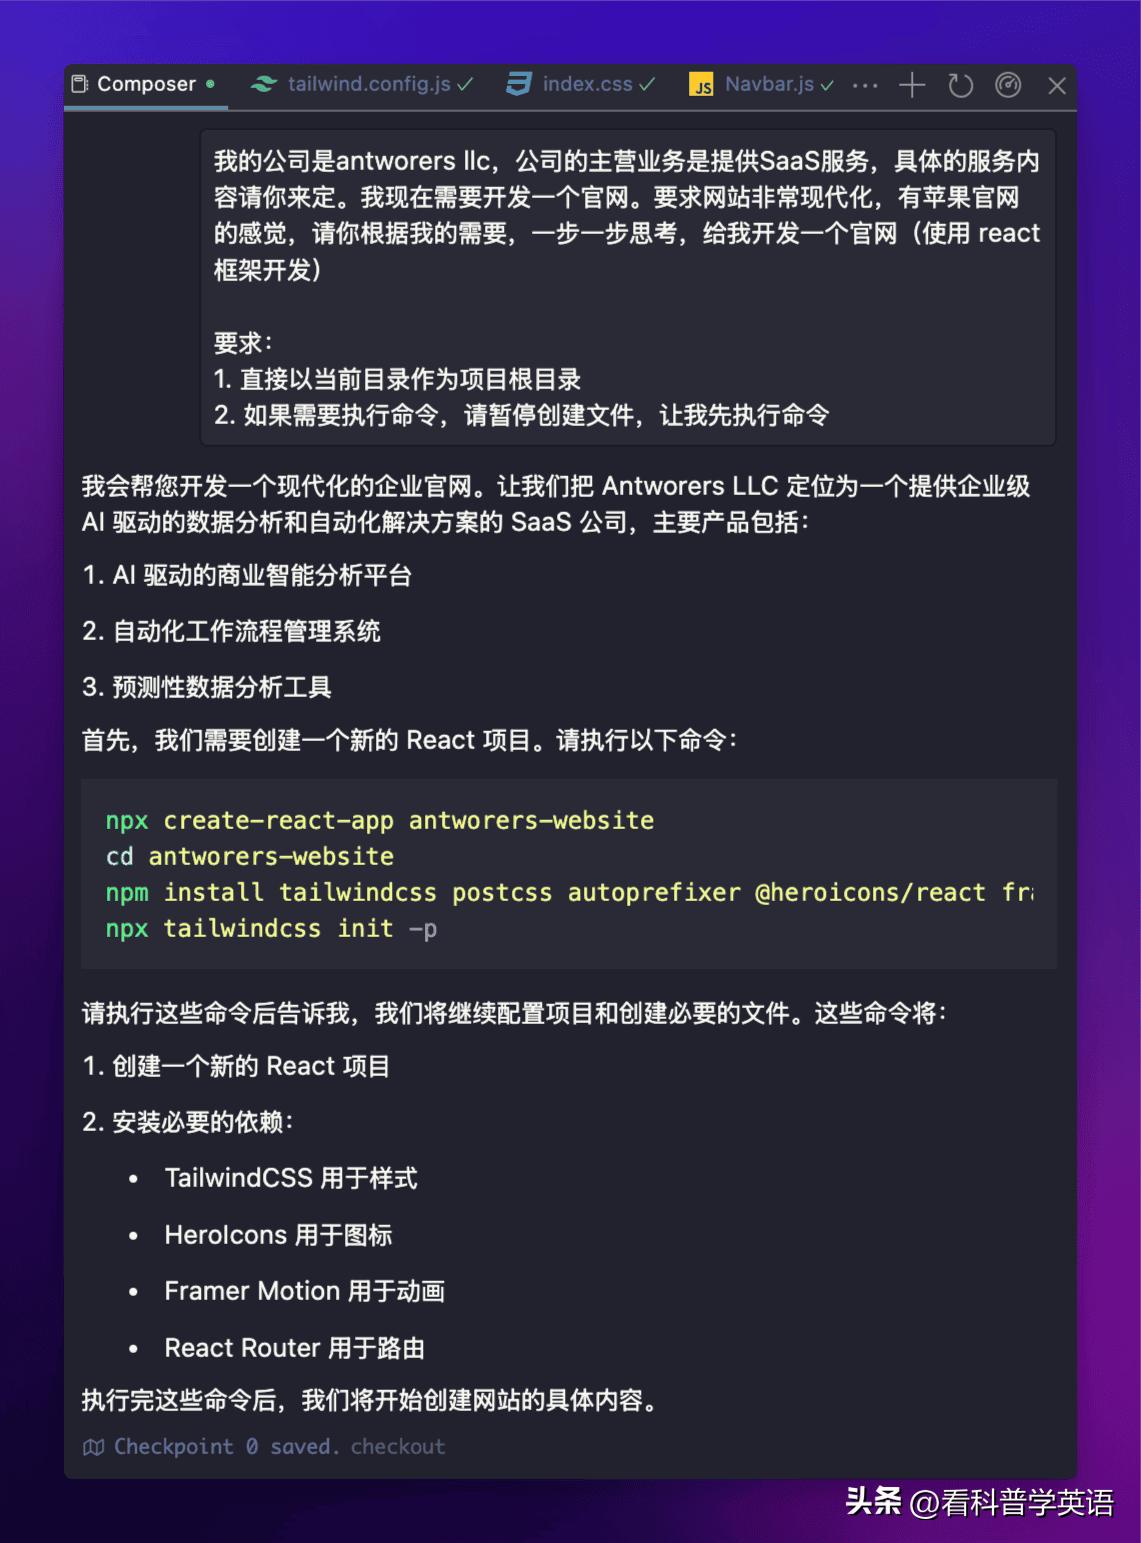
Now, back in the Cursor interface, let’s start casting spells.
Press the shortcut key CMD + I (or Ctrl + I on Windows/Linux) to open the Cursor Composer interface.
In the Composer input box, first enter @ and select Codebase, allowing Cursor to analyze all files in the project. Then enter the following prompt:
This project is a navigation site themed around "Cursor: an AI-powered enhanced code editor" with various tutorials, practical tips, and video resources. Please translate all English text on the site into Chinese. Use CoT reasoning to think step by step to complete my task.
It will then begin to think step by step and complete the task.
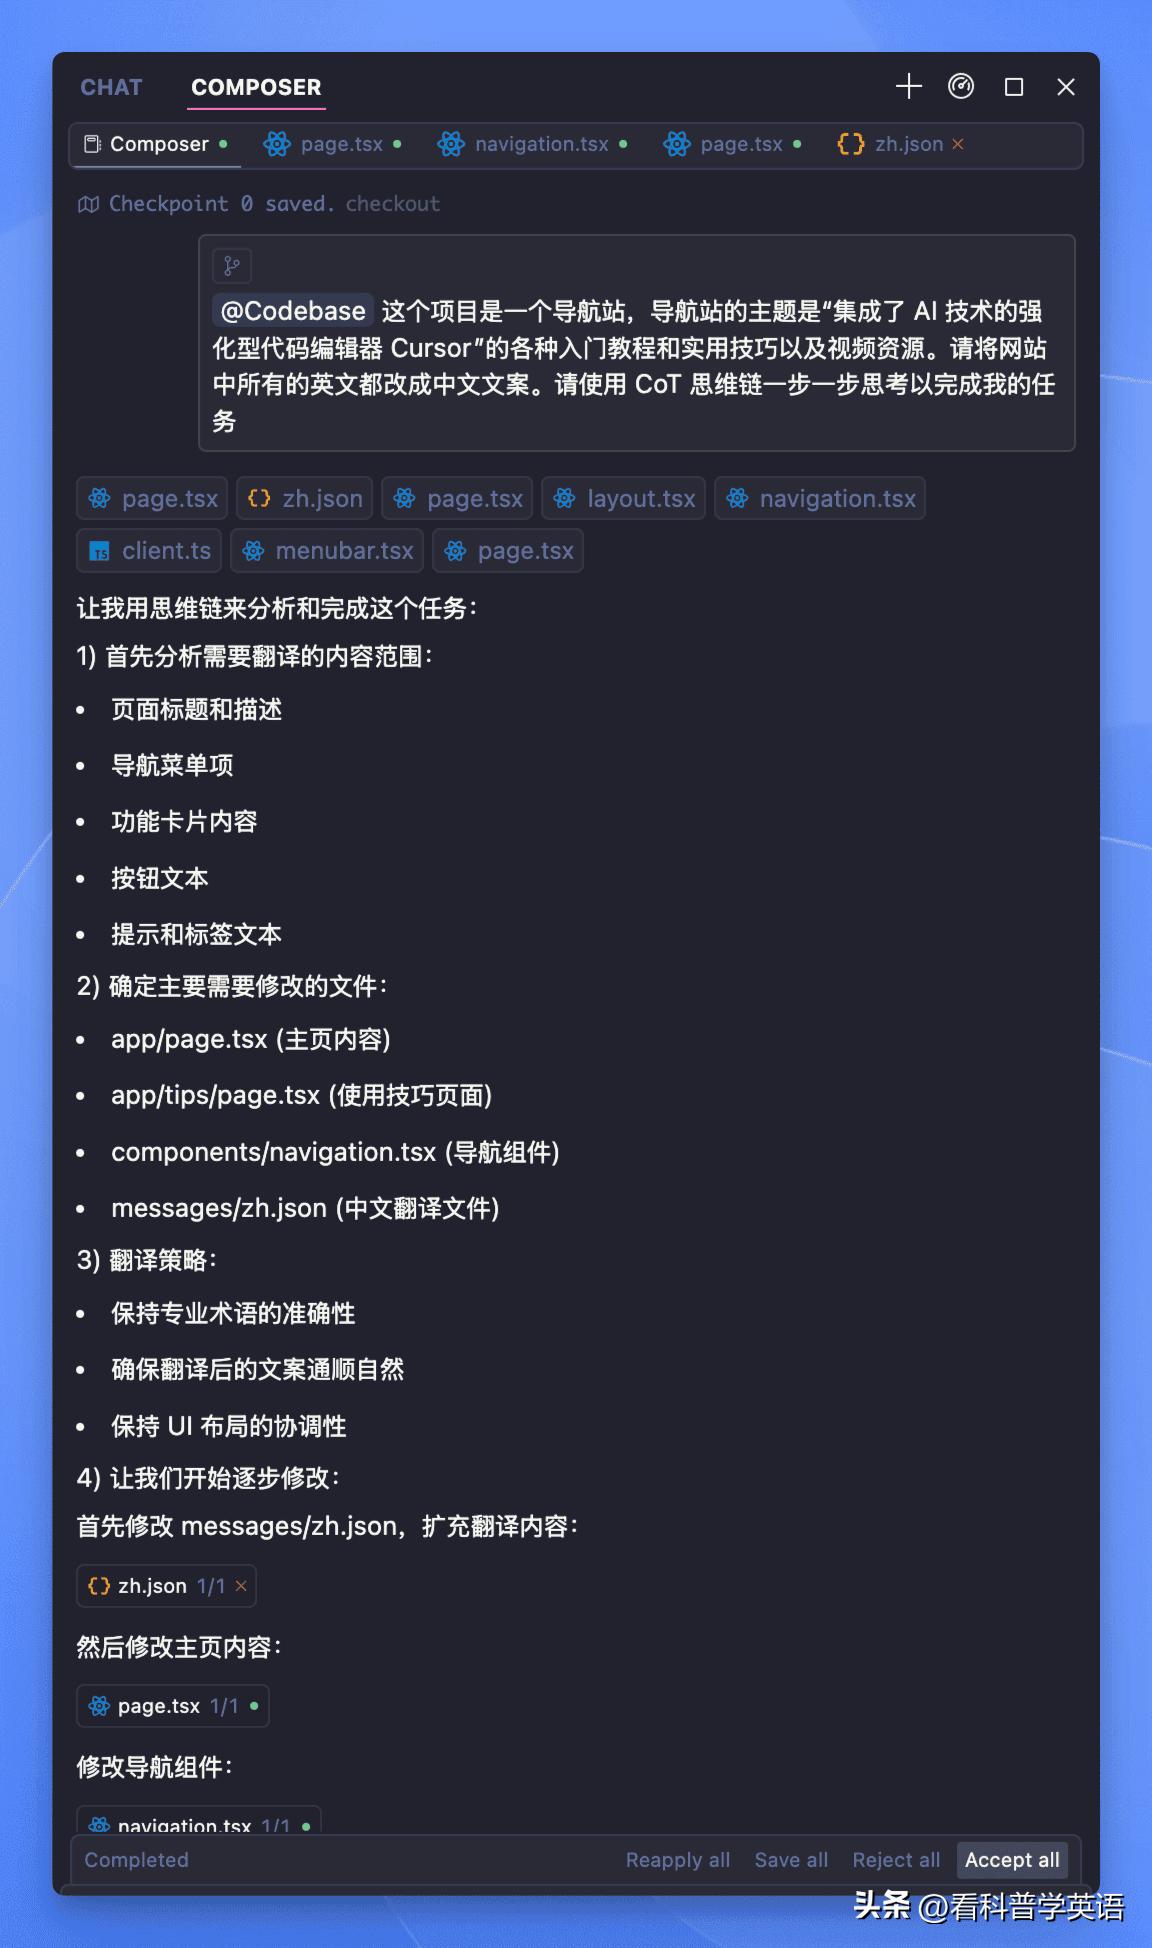
Tip: Using CoT reasoning in the prompt allows Cursor to think step by step, increasing accuracy.
Now, I just need to check if the AI’s code modifications are correct and click “Accept all” to accept all changes.
Let’s take a look at the results of its modifications:
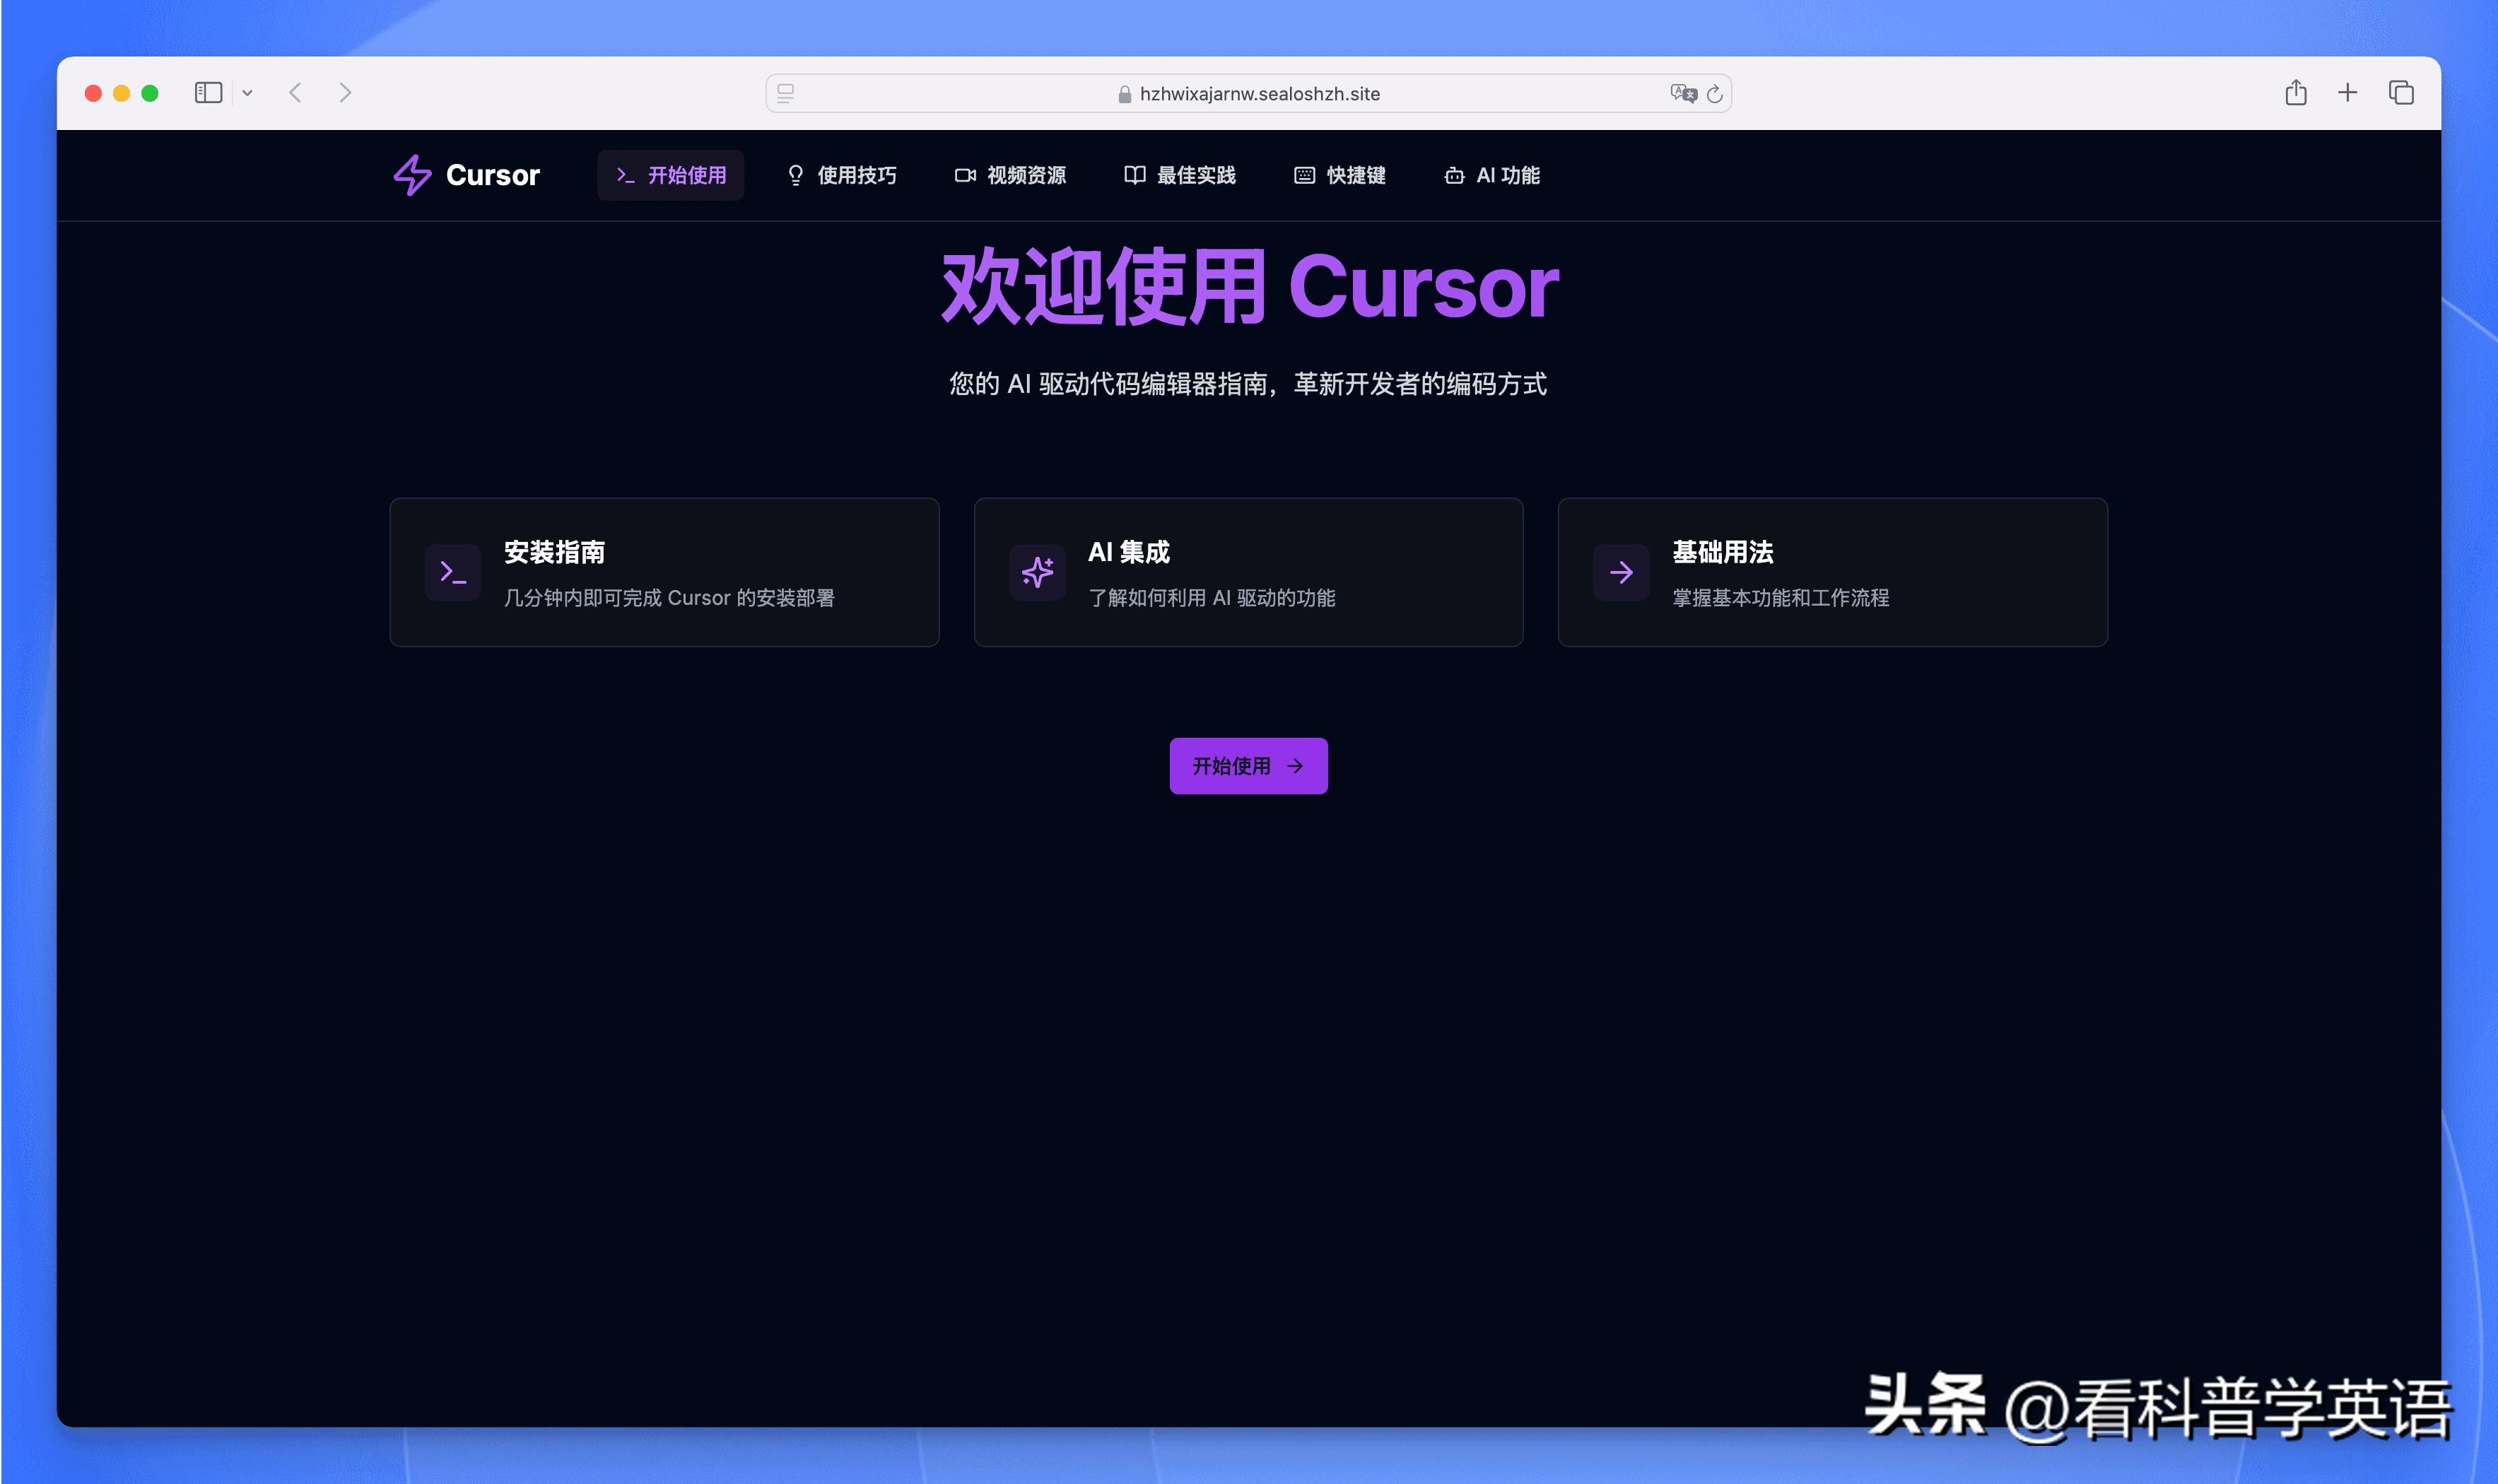
I won’t say much; you can feel it for yourself!
We can continue optimizing; after all, I don’t understand Node.js, Next.js, or Tailwind CSS—I just cast spells.
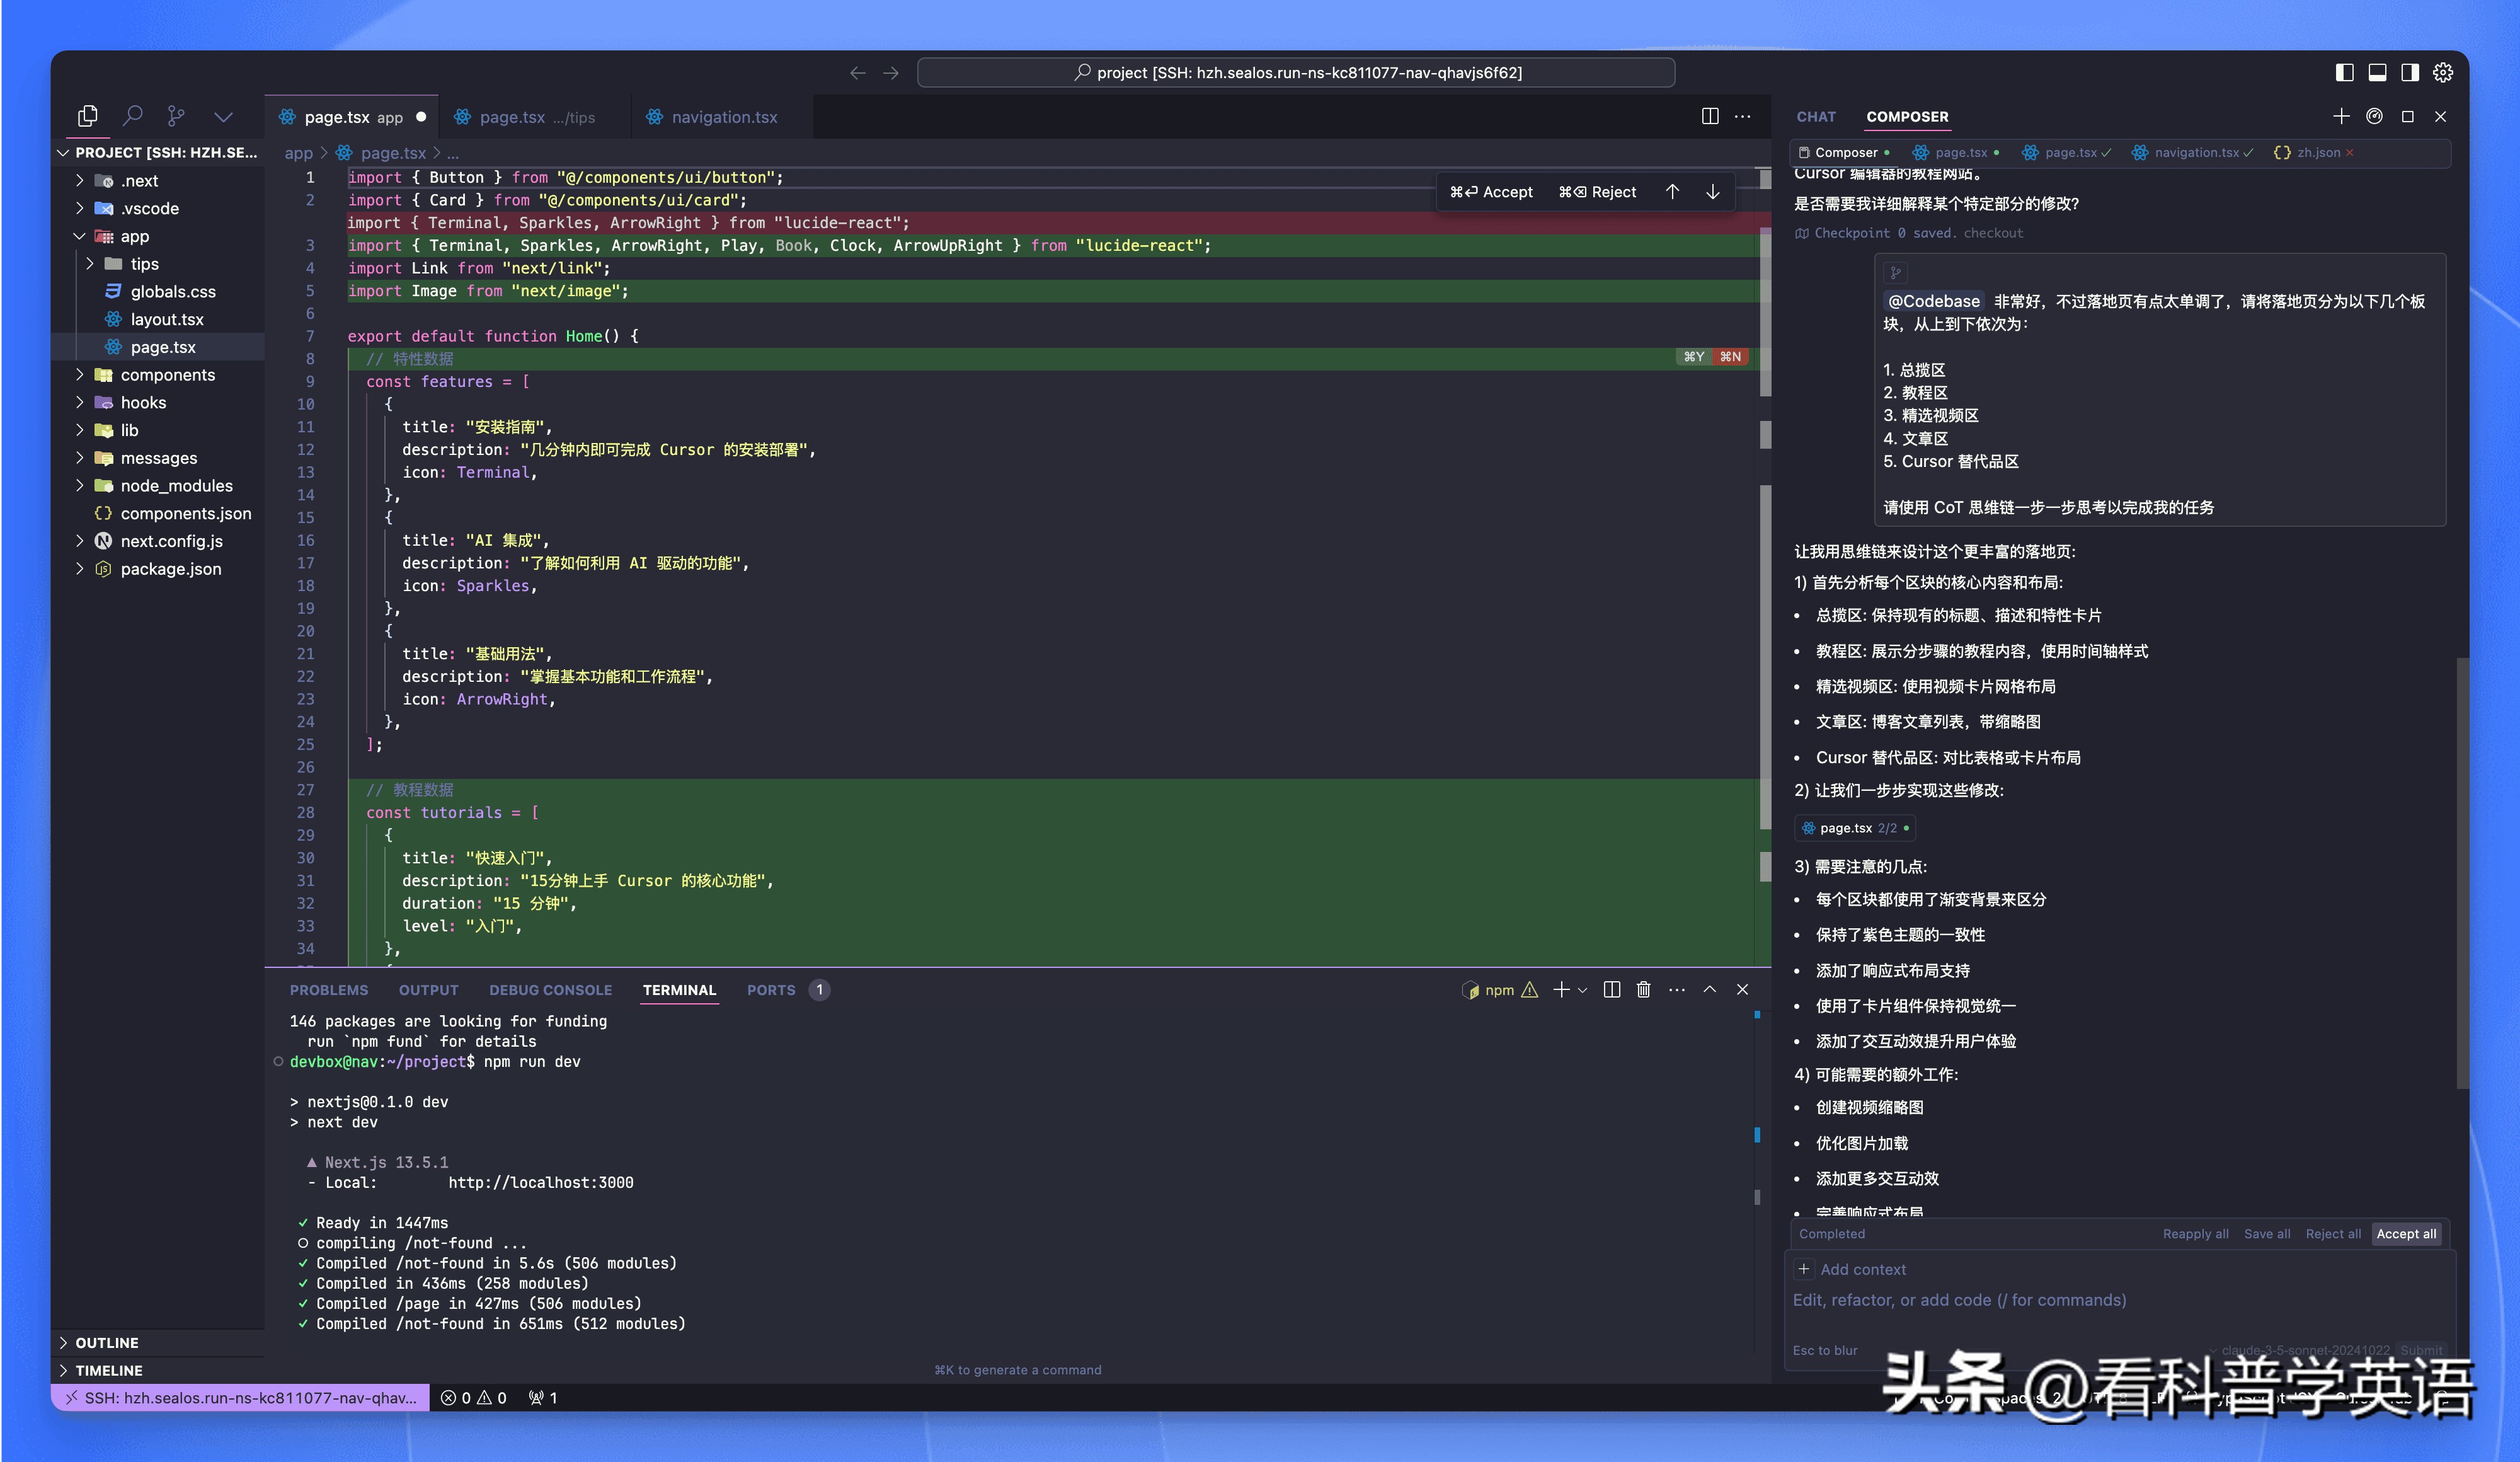
Let’s see the effects:
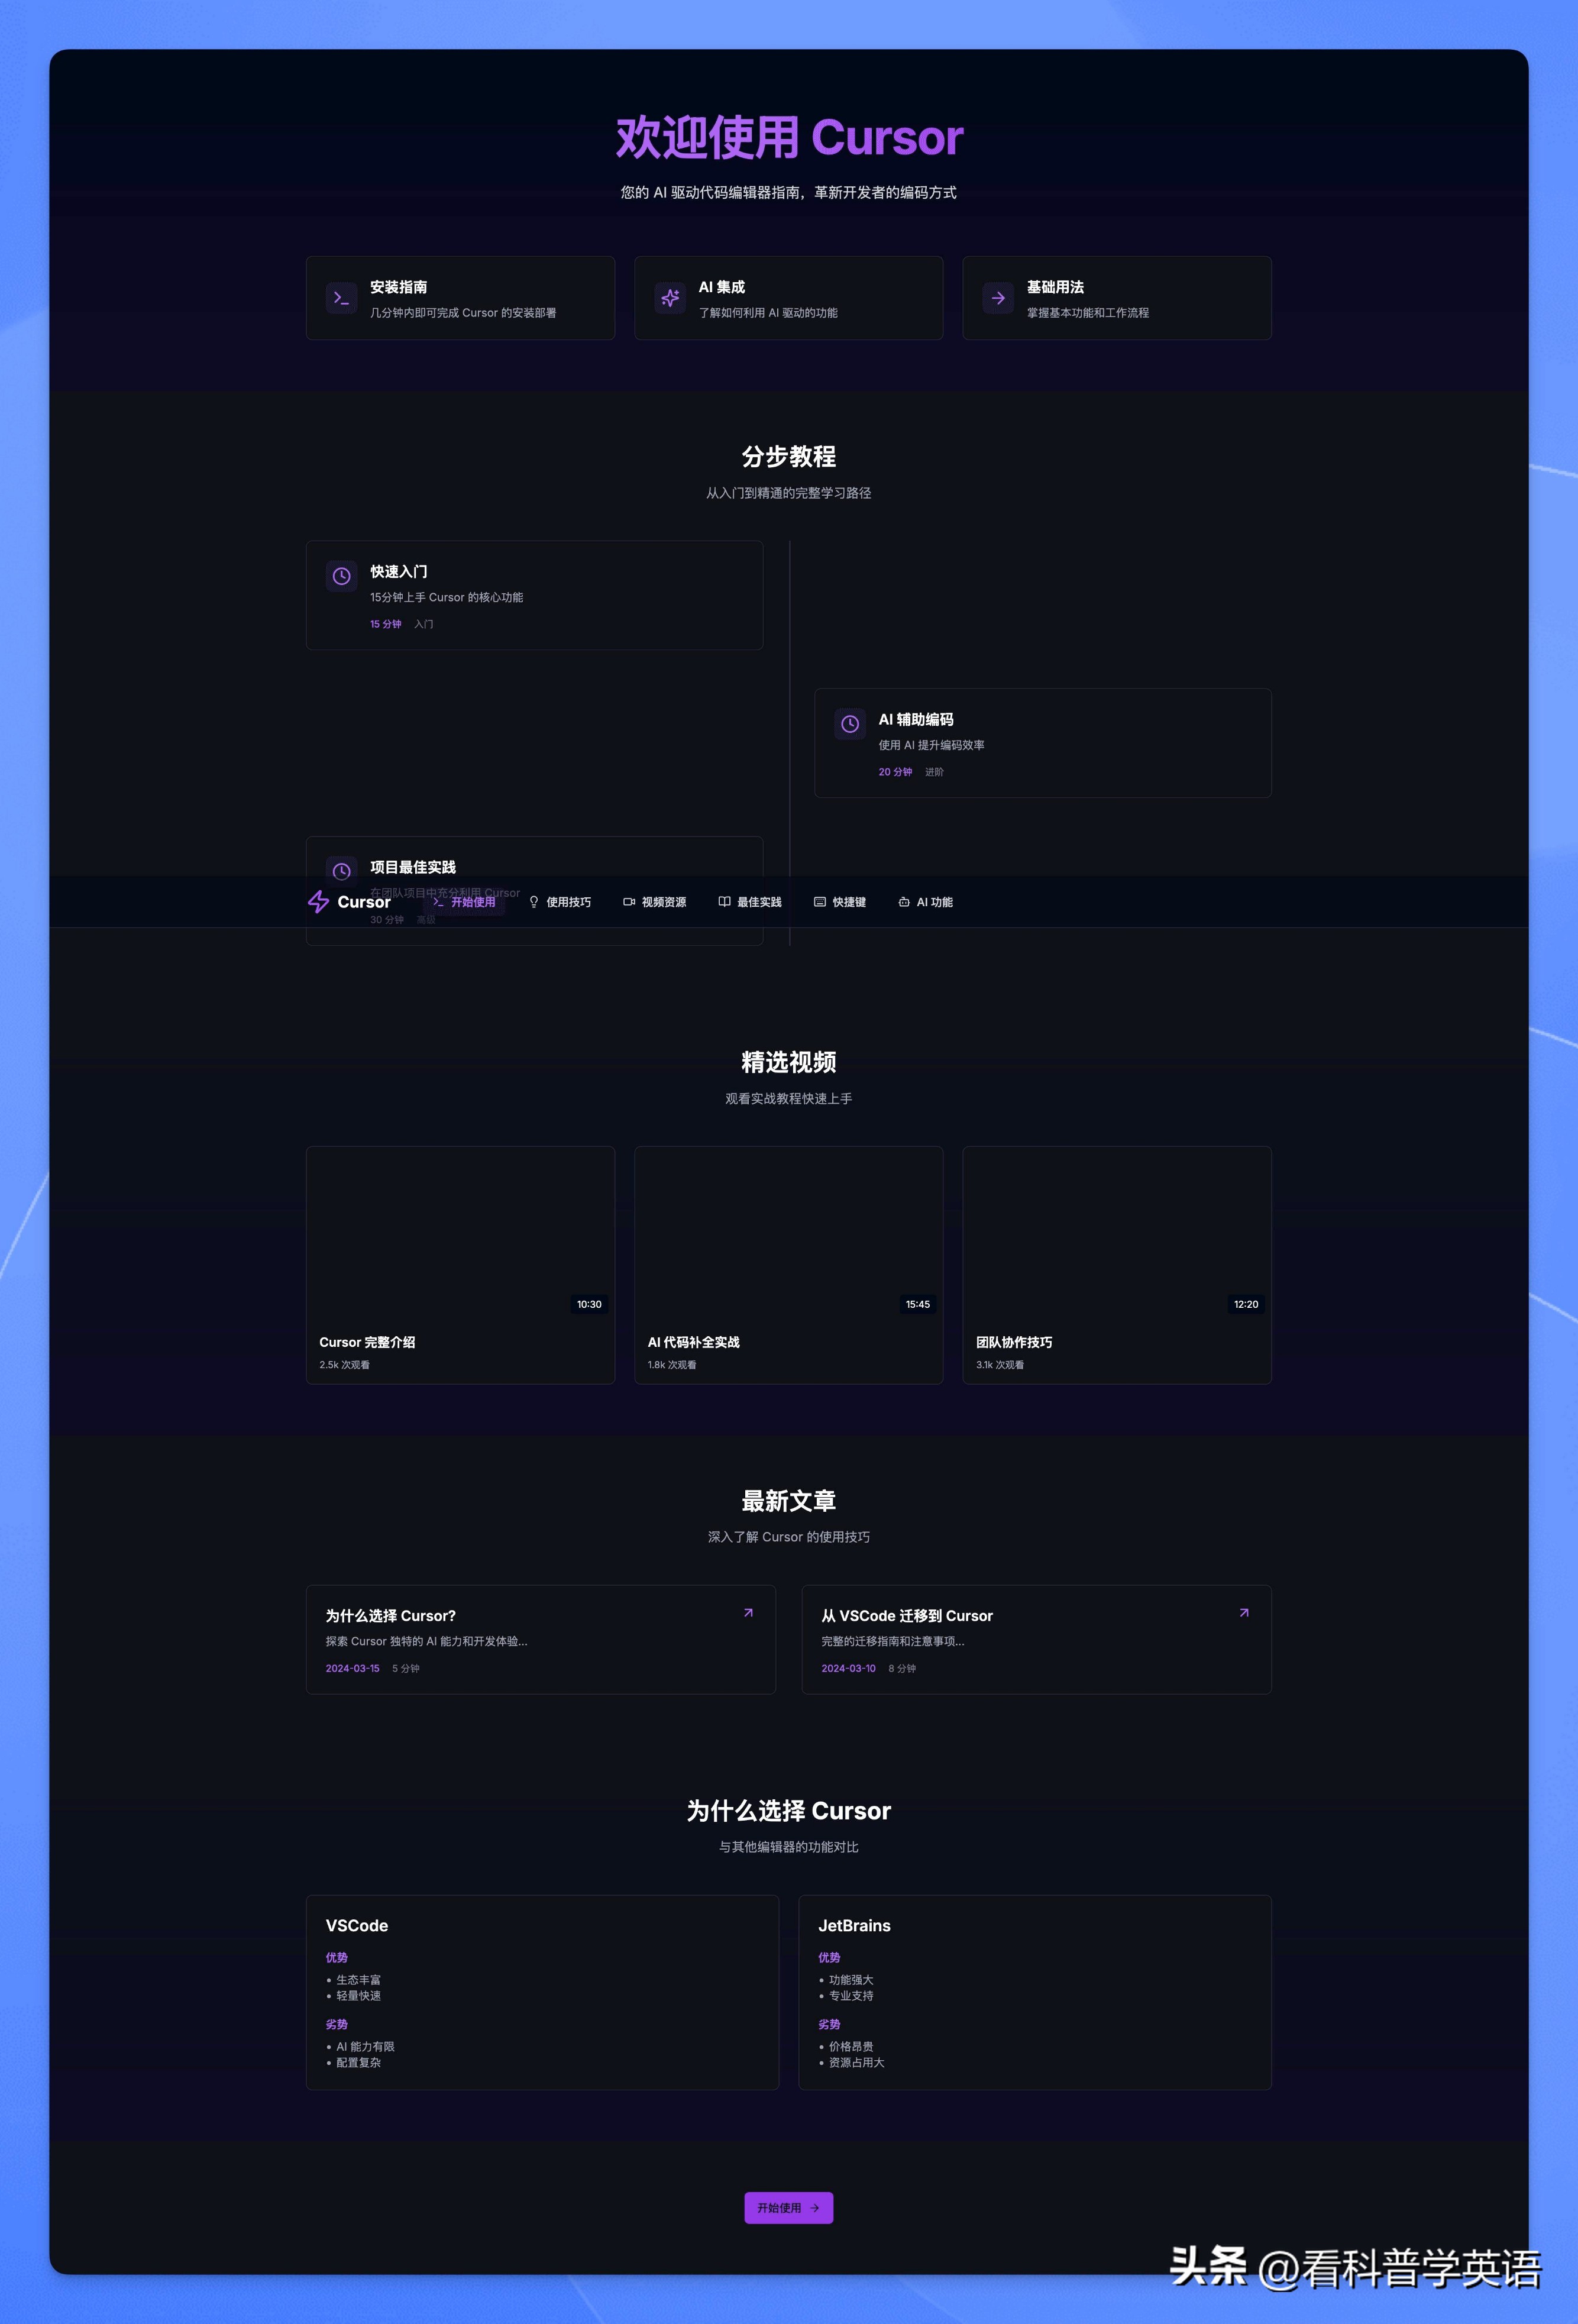
Wow, look at that!
Of course, this isn’t the end; you can keep casting spells to let it help you optimize text, support internationalization, generate unit tests, and create documentation…
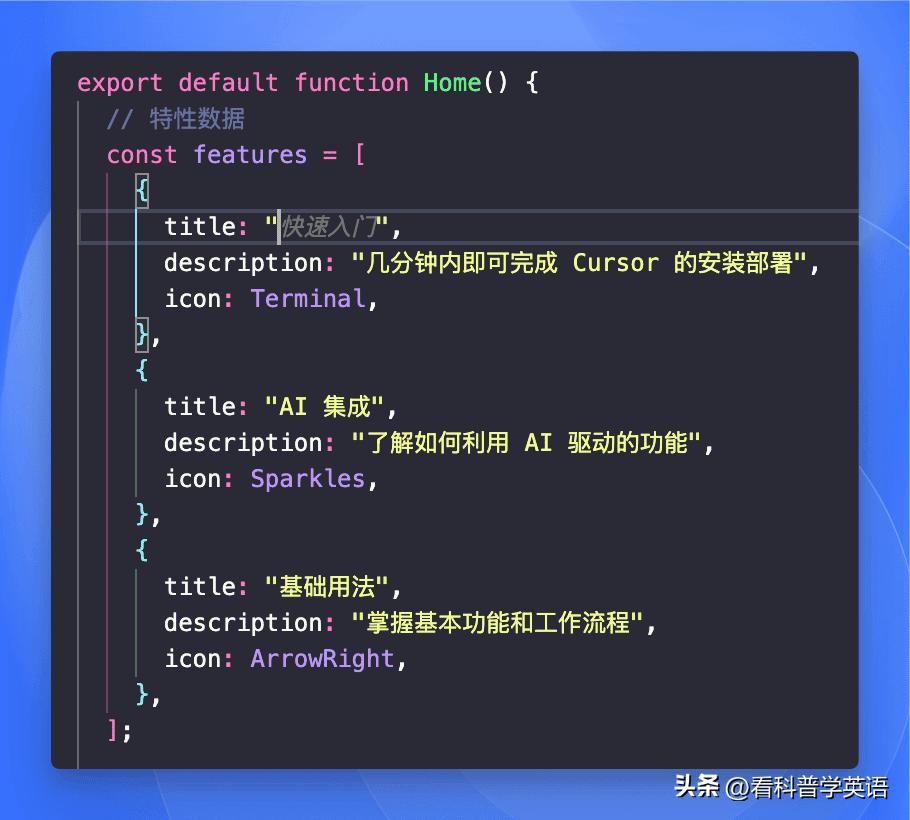
If you feel like tweaking the code yourself, that’s fine too. You can see I just added a line, and Cursor starts predicting what I want to write. If it looks good, just press the Tab key to complete it…
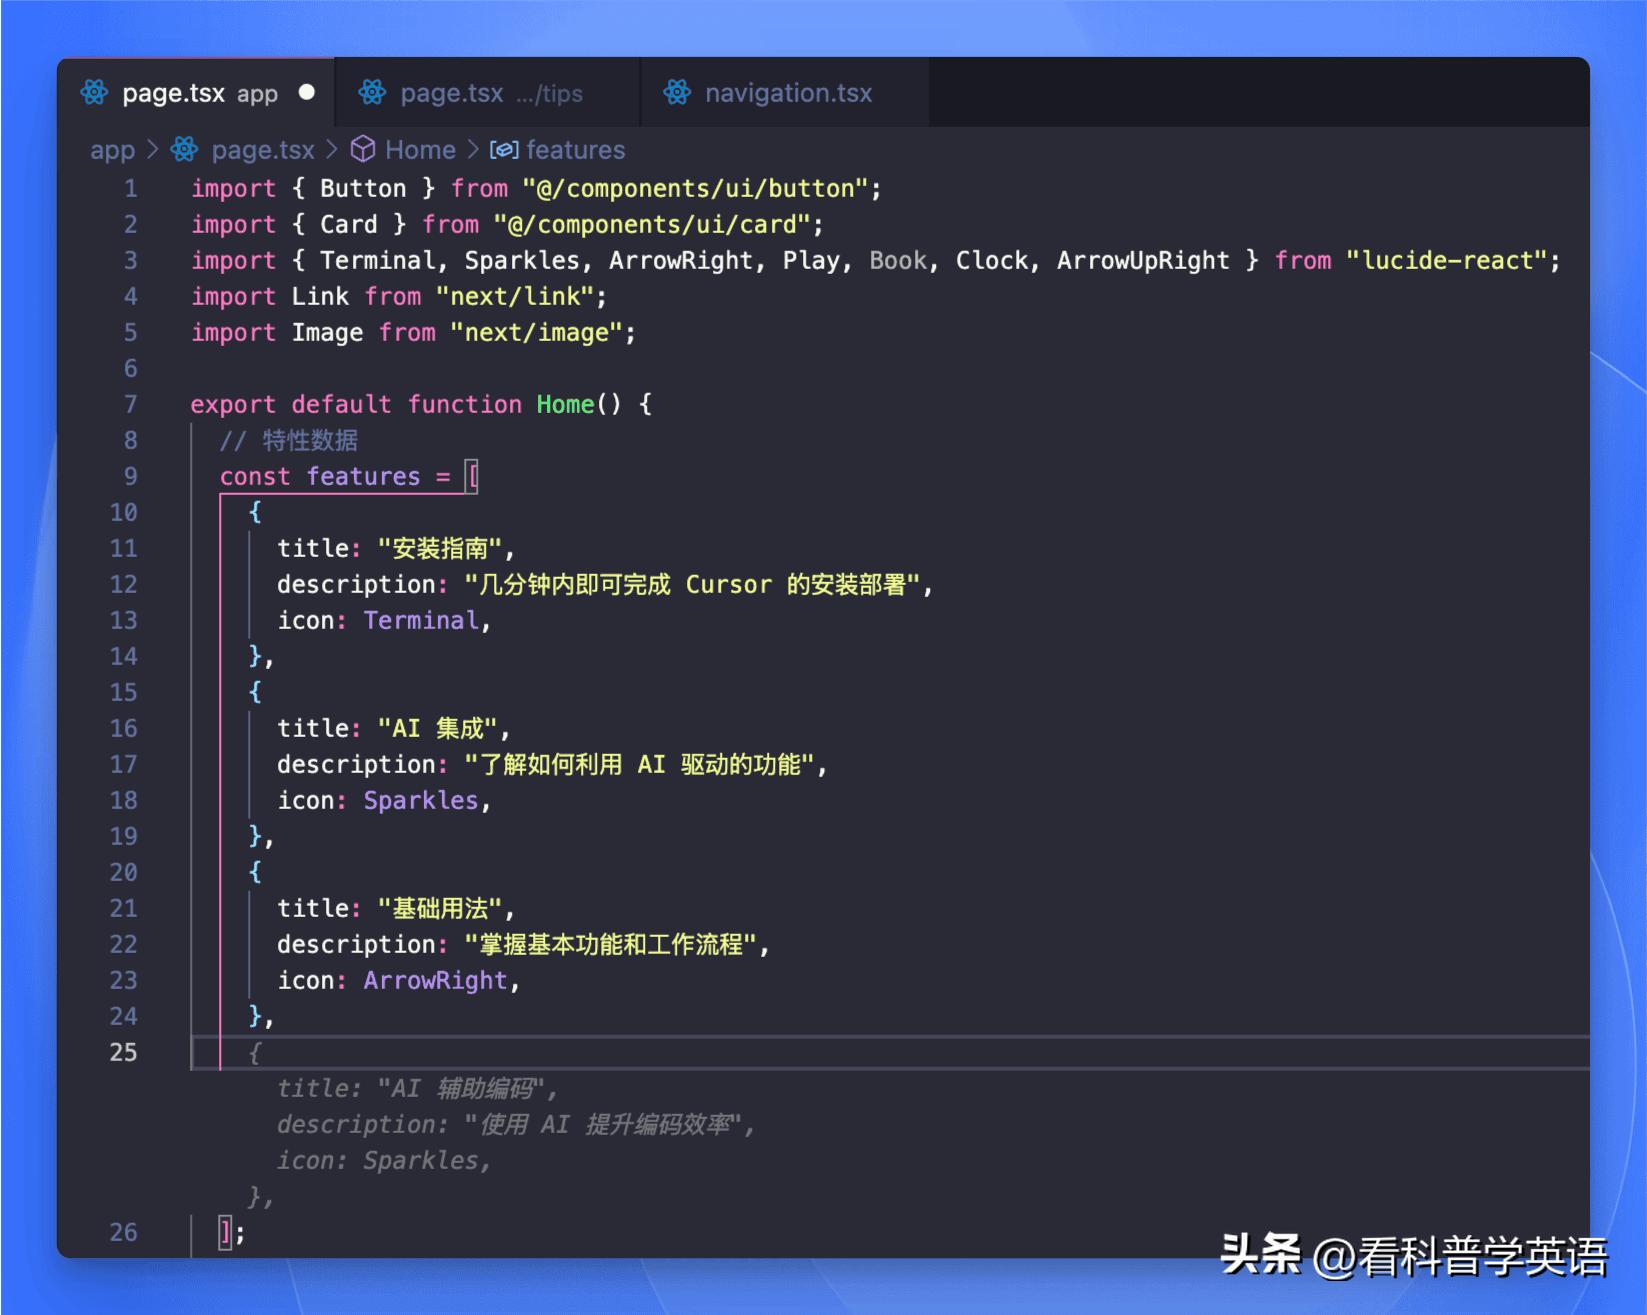
I thought the “Installation Guide” might not be suitable, so I deleted it, and Cursor began predicting what I wanted to write next. If it looks good, I can just press the Tab key to complete it…
Conclusion
That’s it for now; I believe you have felt Cursor’s power.
This website has many areas for optimization, such as:
- Adding a search function to help users quickly find desired tutorials.
- Implementing a comment system for users to share their experiences.
- Creating a user system to bookmark favorite tutorials.
- Adding more tutorial categories, such as advanced techniques and practical cases.
- Optimizing SEO to help more people discover this site.
- ……
These optimizations are up to you to explore. Remember, you don’t need to know much about programming; just knowing how to cast spells is enough.
Let Cursor be your capable assistant and help you complete these optimization tasks. After all, humans are just the co-pilot; AI is the pilot!
Comments
Discussion is powered by Giscus (GitHub Discussions). Add
repo,repoID,category, andcategoryIDunder[params.comments.giscus]inhugo.tomlusing the values from the Giscus setup tool.